)

 Realms: Blitz is a real-time strategy variant of Eternum designed for rapid, competitive play. In each 90-minute match,
players strategically manage resources, explore territories, and engage in high-intensity military confrontations.
Blitz's streamlined mechanics and accelerated gameplay require swift decision-making and adaptability, resulting in a
high skill ceiling that rewards skill and experience. Both human and AI agent players compete under the same ruleset,
making Blitz a true test of strategic mastery regardless of who—or what—controls the armies. The no-stakes Recruit
bracket allows new players to learn the game, while experienced Lords can sharpen their skills in preparation for
higher-stakes games. Lords can compete for $LORDS token stakes in Gladiator bracket, while Warrior bracket games form
the core of a Blitz 'series'—where success brings additional Loot Chest rewards and invitations to the coveted Elite
bracket, which offers even greater prizes!
## Rule Summary
### Game Duration
Each Blitz game runs for exactly **90 minutes**. Time is measured in Eternum Days, which are six minutes long and
divided into six 'phases'.
### Realms
* **Three Starting Realms**: Each player starts with three Realms, evenly spaced apart in a triangle formation.
* **Equal Capability**: At the start of the game, all Realms in Blitz are functionally identical.
* **Unrestricted Building**: Players can construct any resource building they wish, restricted only by build space and
population.
* **No Wonders or Villages**: Wonders and the Village system are not present in Blitz.
* **Conquest Mechanics**: All Realms are vulnerable to capture by other players; deployed armies of a captured Realm
become the property of the conquering Lord, while any troops stored in the structure or in transit to it are destroyed
(this destruction rule applies to all player-owned structures).
### Materials
* **Simplified Resources**: Only 9 resources are available - Wood, Coal, Copper, Ironwood, Cold Iron, Gold, Adamantine,
Mithril, and Dragonhide.
* **Simplified Food**: Only 1 food type - Wheat.
* **Essence**: New material found by exploring the map and interacting with World Structures, required for some
production, buildings and upgrades.
* **Labor**: Produced by each Realm at a fixed rate, required for all construction and 'labor mode' production.
* **Donkeys**: Required for moving materials around the world, essential for logistics.
* **Troops**: 3 types (Knights, Crossbowmen, Paladins), 3 tiers (T1, T2, T3).
* **Restricted Bridging**: Players may only bridge Relics into the game (not out). Other materials can't be bridged.
*Note: This feature is a work in progress, the tokenized Relics and Relic Chest system is not active yet.*
* **Donkey Cost**: Donkeys only cost food to produce (no $LORDS cost).
* **No P2P Transfers**: No direct transfers or trade between players.
### Buildings
* **Construction**: 'Resource mode' and 'labor mode' building systems.
* **Building Types**:
* **The Keep**: Central structure automatically constructed at game start.
* **Resource Buildings**: Specific buildings for each of the 9 resources.
* **Economic Buildings**: Includes Farms, Worker Huts, and Markets.
* **Military Buildings**: Nine different buildings for producing three tiers of each troop type.
* **Placement & Population**: Buildings require buildable hexes and population capacity, with more unlocked as Realms
are upgraded.
### Production
* **Production Types**:
* **Food**: Wheat can be produced without inputs.
* **Resources**: Require combinations of other resources (resource mode) or labor (labor mode).
* **Labor**: Produced by the Keep at a steady rate.
* **Troops**: Essential for exploration and warfare, with production of higher tier troops requiring lower tier troops
as inputs.
* **Donkeys**: One-time-use transport, consumed after a single journey.
* **Altered Rates**: All production rates are increased relative to production requirements for the fast-paced game
format.
### World Map
* **Exploration System**: Players must explore unrevealed hexes to find essence, claim Hyperstructures, and attack
neighbors.
* **Essence Discovery**: Players primarily find essence when exploring, along with small stacks of donkeys, T1 troops
and labor. Resources cannot be discovered through exploration.
* **Relic Discovery**: Powerful Relics can be found in Relic Crates that occasionally appear on the world map.
* **Biomes**: 16 unique biome types affecting combat effectiveness and troop movement.
* **Movement & Stamina**: Armies move using stamina (regenerating at +20 per Phase, +120 per Eternum Day), with costs
varying by biome and troop type.
### Military
* **Army Composition**: Armies consist of a single troop type and tier.
* **Troop Tiers**: T1, T2, and T3 troops with increasing stamina and combat strength.
* **Combat Factors**: Battles are resolved based on army damage, stamina modifiers, and biome effects.
* **Army Types**:
* **Field Armies**: Deploy onto the world map for exploration and conquest.
* **Guard Armies**: Deployed to defense slots to protect structures.
* **Stamina System**: Armies recover +20 stamina each Phase (6 phases per Eternum Day, totaling +120 stamina per day).
* **Biome Effects**: Each troop type has advantages (+30% damage), disadvantages (-30% damage), or no change (0%) in
specific biomes.
* **Reinforcements**: Lords can transport troops by donkey to any Realm, Hyperstructure, Camp or Essence Rift that they
own.
### Scoring System
Leaderboard placing is determined by total accumulated Victory Points, a measure of a Lord's ability to explore the map
and control World Structures. Victory Points are awarded for:
* Exploring tiles
* Claiming World Structures
* Opening Relic Crates
* Claiming Hyperstructures
* Holding Hyperstructures throughout the game
### Victory
Victory Points (VP) determine leaderboard ranking. The players with the highest number of VP at the end of the 90
minutes share in the $LORDS prize pool. This pool is made up of the cumulative entry fees that players pay to enter the
game.
## Blitz Variants
Blitz games come in many forms, and can be configured and deployed by anyone. But the majority of Blitz games are
deployed by the core team in the following forms:
### Recruit Bracket
* **No Stakes**: Free-to-enter bracket for introduction, playtesting and practice.
* **No Entry Cost**: No $LORDS required to participate.
* **Frequency**: Games run multiple times per day on a rotating schedule.
### Gladiator Bracket
* **$LORDS Stakes**: Competitive games with $LORDS stakes.
* **Entry Cost**: Players pay a $LORDS entry fee, contributing to the prize pool.
* **Prize Distribution**: Top-ranking Lords share the prize pool.
* **Frequency**: Games run on a rotating schedule.
### Warrior Bracket
* **Series Games**: These games form part of a competitive Blitz Series.
* **$LORDS Stakes**: Competitive games requiring a $LORDS entry fee, contributing to a prize pool.
* **Prize Distribution**: Top-ranking Lords share the prize pool.
* **Additional Rewards**: Blitz Rewards Chests containing cosmetic items.
* **Special Invites**: Highest placing players win tradable NFT invites to the Elite bracket.
* **Frequency**: Games run daily during prime time for key timezones (USA, Europe, Asia-Pacific).
### Elite Bracket
* **Series Games**: These games represent the highest level of play in a competitive Blitz Series.
* **Ticket Entry Cost**: Entry requires an NFT invite from Warrior bracket (no additional $LORDS cost).
* **Prize Pool**: Large, DAO-funded prize pool.
* **Rewards**: Elite Blitz Rewards Chests containing cosmetic items.
* **Frequency**: A limited number of games run in the final week of a Blitz series.
### Blitz Series
While Recruit and Gladiator games can be deployed and played as frequently as the player base demands, games with stakes
(Warrior/Elite) are organized into 'series'. Each series takes place between Eternum seasons to bridge the gap in
gameplay and provide continuous competitive opportunities.
## Matchmaking Rating (MMR)
Blitz features an onchain Matchmaking Rating system that tracks player skill across rated games. After each rated match,
the system evaluates your final rank relative to the lobby's average skill level and adjusts your rating accordingly.
MMR is persistent across games and is tracked via a non-transferable onchain token, providing a transparent and
verifiable measure of long-term performance. For full details, see the [MMR](/blitz/mmr) page.
## Rewards
Successful Blitz players can earn various rewards including:
* **$LORDS Token**: Prize pool distributions for top players.
* **Loot Chests**: Blitz Rewards Chests and Elite Blitz Rewards Chests containing consumables and cosmetic items.
* **Elite Entry Tickets**: NFT invites to Elite bracket games for top Warrior bracket performers.
---
file: docs/pages/blitz/mmr.mdx
meta: {
"title": "Blitz MMR",
"description": "How Blitz Matchmaking Rating works and how updates are claimed"
}
# 📈 Blitz MMR
Blitz MMR (Matchmaking Rating) is an onchain skill rating that tracks player performance across rated Blitz games. It is
enabled on a per-world basis; if a world has MMR disabled, no ratings are tracked.
## What MMR Measures
MMR is a **persistent rating** intended to reflect long-term performance rather than a single match outcome. After a
game ends, the system updates each eligible player’s MMR based on:
* Your **final rank** in the match
* Your **expected performance** relative to the lobby’s median MMR
* Lobby size scaling (larger lobbies produce more stable deltas)
## Eligibility (Who Gets Rated)
Only players who are:
* **Registered** in the match, and
* Have **non-zero recorded points**
are included in the rated update.
## How the Update Is Calculated (High Level)
Blitz uses a percentile-based update that compares:
* **Expected percentile** (from a logistic curve around the lobby median), vs.
* **Actual percentile** (from your finishing rank)
The resulting delta is capped (diminishing returns) and includes a small mean-regression term toward the configured
distribution mean.
> Implementation note: the onchain calculator follows an 8-step formula including median MMR, expected/actual
> percentile, capped delta, split-lobby adjustment, and mean regression.
## Claim / Update Flow (Commit + Claim)
MMR updates are applied after the match completes via a single action in the client:
1. **Finalize ranking** for the match (MMR cannot update until final ranking exists).
2. Open **Social → MMR**.
3. Click **Update MMR**.
When you click Update MMR, the client:
* Fetches current MMR values for eligible players from the MMR token contract
* Sorts players by current MMR (lowest → highest) as required by the commit call
* Submits a single onchain transaction to commit the game’s MMR update and apply new ratings
Once committed, the update cannot be run again for that match.
---
file: docs/pages/blitz/prize-pool.mdx
meta: {
"title": "Prize Pool & Distribution",
"description": "How $LORDS prizes are calculated and distributed in Blitz"
}
import "@/styles.css";
# Prize Pool & Distribution
Blitz distributes **$LORDS** to players at the end of every game based on their final rank. The system adapts to lobby
size, the ratio of entry fees to sponsored prizes, and how many players actually score — so payouts stay fair whether
there are 2 or 24 players in a match.
## Prize Pool Composition
The total prize pool comes from two sources:
Realms: Blitz is a real-time strategy variant of Eternum designed for rapid, competitive play. In each 90-minute match,
players strategically manage resources, explore territories, and engage in high-intensity military confrontations.
Blitz's streamlined mechanics and accelerated gameplay require swift decision-making and adaptability, resulting in a
high skill ceiling that rewards skill and experience. Both human and AI agent players compete under the same ruleset,
making Blitz a true test of strategic mastery regardless of who—or what—controls the armies. The no-stakes Recruit
bracket allows new players to learn the game, while experienced Lords can sharpen their skills in preparation for
higher-stakes games. Lords can compete for $LORDS token stakes in Gladiator bracket, while Warrior bracket games form
the core of a Blitz 'series'—where success brings additional Loot Chest rewards and invitations to the coveted Elite
bracket, which offers even greater prizes!
## Rule Summary
### Game Duration
Each Blitz game runs for exactly **90 minutes**. Time is measured in Eternum Days, which are six minutes long and
divided into six 'phases'.
### Realms
* **Three Starting Realms**: Each player starts with three Realms, evenly spaced apart in a triangle formation.
* **Equal Capability**: At the start of the game, all Realms in Blitz are functionally identical.
* **Unrestricted Building**: Players can construct any resource building they wish, restricted only by build space and
population.
* **No Wonders or Villages**: Wonders and the Village system are not present in Blitz.
* **Conquest Mechanics**: All Realms are vulnerable to capture by other players; deployed armies of a captured Realm
become the property of the conquering Lord, while any troops stored in the structure or in transit to it are destroyed
(this destruction rule applies to all player-owned structures).
### Materials
* **Simplified Resources**: Only 9 resources are available - Wood, Coal, Copper, Ironwood, Cold Iron, Gold, Adamantine,
Mithril, and Dragonhide.
* **Simplified Food**: Only 1 food type - Wheat.
* **Essence**: New material found by exploring the map and interacting with World Structures, required for some
production, buildings and upgrades.
* **Labor**: Produced by each Realm at a fixed rate, required for all construction and 'labor mode' production.
* **Donkeys**: Required for moving materials around the world, essential for logistics.
* **Troops**: 3 types (Knights, Crossbowmen, Paladins), 3 tiers (T1, T2, T3).
* **Restricted Bridging**: Players may only bridge Relics into the game (not out). Other materials can't be bridged.
*Note: This feature is a work in progress, the tokenized Relics and Relic Chest system is not active yet.*
* **Donkey Cost**: Donkeys only cost food to produce (no $LORDS cost).
* **No P2P Transfers**: No direct transfers or trade between players.
### Buildings
* **Construction**: 'Resource mode' and 'labor mode' building systems.
* **Building Types**:
* **The Keep**: Central structure automatically constructed at game start.
* **Resource Buildings**: Specific buildings for each of the 9 resources.
* **Economic Buildings**: Includes Farms, Worker Huts, and Markets.
* **Military Buildings**: Nine different buildings for producing three tiers of each troop type.
* **Placement & Population**: Buildings require buildable hexes and population capacity, with more unlocked as Realms
are upgraded.
### Production
* **Production Types**:
* **Food**: Wheat can be produced without inputs.
* **Resources**: Require combinations of other resources (resource mode) or labor (labor mode).
* **Labor**: Produced by the Keep at a steady rate.
* **Troops**: Essential for exploration and warfare, with production of higher tier troops requiring lower tier troops
as inputs.
* **Donkeys**: One-time-use transport, consumed after a single journey.
* **Altered Rates**: All production rates are increased relative to production requirements for the fast-paced game
format.
### World Map
* **Exploration System**: Players must explore unrevealed hexes to find essence, claim Hyperstructures, and attack
neighbors.
* **Essence Discovery**: Players primarily find essence when exploring, along with small stacks of donkeys, T1 troops
and labor. Resources cannot be discovered through exploration.
* **Relic Discovery**: Powerful Relics can be found in Relic Crates that occasionally appear on the world map.
* **Biomes**: 16 unique biome types affecting combat effectiveness and troop movement.
* **Movement & Stamina**: Armies move using stamina (regenerating at +20 per Phase, +120 per Eternum Day), with costs
varying by biome and troop type.
### Military
* **Army Composition**: Armies consist of a single troop type and tier.
* **Troop Tiers**: T1, T2, and T3 troops with increasing stamina and combat strength.
* **Combat Factors**: Battles are resolved based on army damage, stamina modifiers, and biome effects.
* **Army Types**:
* **Field Armies**: Deploy onto the world map for exploration and conquest.
* **Guard Armies**: Deployed to defense slots to protect structures.
* **Stamina System**: Armies recover +20 stamina each Phase (6 phases per Eternum Day, totaling +120 stamina per day).
* **Biome Effects**: Each troop type has advantages (+30% damage), disadvantages (-30% damage), or no change (0%) in
specific biomes.
* **Reinforcements**: Lords can transport troops by donkey to any Realm, Hyperstructure, Camp or Essence Rift that they
own.
### Scoring System
Leaderboard placing is determined by total accumulated Victory Points, a measure of a Lord's ability to explore the map
and control World Structures. Victory Points are awarded for:
* Exploring tiles
* Claiming World Structures
* Opening Relic Crates
* Claiming Hyperstructures
* Holding Hyperstructures throughout the game
### Victory
Victory Points (VP) determine leaderboard ranking. The players with the highest number of VP at the end of the 90
minutes share in the $LORDS prize pool. This pool is made up of the cumulative entry fees that players pay to enter the
game.
## Blitz Variants
Blitz games come in many forms, and can be configured and deployed by anyone. But the majority of Blitz games are
deployed by the core team in the following forms:
### Recruit Bracket
* **No Stakes**: Free-to-enter bracket for introduction, playtesting and practice.
* **No Entry Cost**: No $LORDS required to participate.
* **Frequency**: Games run multiple times per day on a rotating schedule.
### Gladiator Bracket
* **$LORDS Stakes**: Competitive games with $LORDS stakes.
* **Entry Cost**: Players pay a $LORDS entry fee, contributing to the prize pool.
* **Prize Distribution**: Top-ranking Lords share the prize pool.
* **Frequency**: Games run on a rotating schedule.
### Warrior Bracket
* **Series Games**: These games form part of a competitive Blitz Series.
* **$LORDS Stakes**: Competitive games requiring a $LORDS entry fee, contributing to a prize pool.
* **Prize Distribution**: Top-ranking Lords share the prize pool.
* **Additional Rewards**: Blitz Rewards Chests containing cosmetic items.
* **Special Invites**: Highest placing players win tradable NFT invites to the Elite bracket.
* **Frequency**: Games run daily during prime time for key timezones (USA, Europe, Asia-Pacific).
### Elite Bracket
* **Series Games**: These games represent the highest level of play in a competitive Blitz Series.
* **Ticket Entry Cost**: Entry requires an NFT invite from Warrior bracket (no additional $LORDS cost).
* **Prize Pool**: Large, DAO-funded prize pool.
* **Rewards**: Elite Blitz Rewards Chests containing cosmetic items.
* **Frequency**: A limited number of games run in the final week of a Blitz series.
### Blitz Series
While Recruit and Gladiator games can be deployed and played as frequently as the player base demands, games with stakes
(Warrior/Elite) are organized into 'series'. Each series takes place between Eternum seasons to bridge the gap in
gameplay and provide continuous competitive opportunities.
## Matchmaking Rating (MMR)
Blitz features an onchain Matchmaking Rating system that tracks player skill across rated games. After each rated match,
the system evaluates your final rank relative to the lobby's average skill level and adjusts your rating accordingly.
MMR is persistent across games and is tracked via a non-transferable onchain token, providing a transparent and
verifiable measure of long-term performance. For full details, see the [MMR](/blitz/mmr) page.
## Rewards
Successful Blitz players can earn various rewards including:
* **$LORDS Token**: Prize pool distributions for top players.
* **Loot Chests**: Blitz Rewards Chests and Elite Blitz Rewards Chests containing consumables and cosmetic items.
* **Elite Entry Tickets**: NFT invites to Elite bracket games for top Warrior bracket performers.
---
file: docs/pages/blitz/mmr.mdx
meta: {
"title": "Blitz MMR",
"description": "How Blitz Matchmaking Rating works and how updates are claimed"
}
# 📈 Blitz MMR
Blitz MMR (Matchmaking Rating) is an onchain skill rating that tracks player performance across rated Blitz games. It is
enabled on a per-world basis; if a world has MMR disabled, no ratings are tracked.
## What MMR Measures
MMR is a **persistent rating** intended to reflect long-term performance rather than a single match outcome. After a
game ends, the system updates each eligible player’s MMR based on:
* Your **final rank** in the match
* Your **expected performance** relative to the lobby’s median MMR
* Lobby size scaling (larger lobbies produce more stable deltas)
## Eligibility (Who Gets Rated)
Only players who are:
* **Registered** in the match, and
* Have **non-zero recorded points**
are included in the rated update.
## How the Update Is Calculated (High Level)
Blitz uses a percentile-based update that compares:
* **Expected percentile** (from a logistic curve around the lobby median), vs.
* **Actual percentile** (from your finishing rank)
The resulting delta is capped (diminishing returns) and includes a small mean-regression term toward the configured
distribution mean.
> Implementation note: the onchain calculator follows an 8-step formula including median MMR, expected/actual
> percentile, capped delta, split-lobby adjustment, and mean regression.
## Claim / Update Flow (Commit + Claim)
MMR updates are applied after the match completes via a single action in the client:
1. **Finalize ranking** for the match (MMR cannot update until final ranking exists).
2. Open **Social → MMR**.
3. Click **Update MMR**.
When you click Update MMR, the client:
* Fetches current MMR values for eligible players from the MMR token contract
* Sorts players by current MMR (lowest → highest) as required by the commit call
* Submits a single onchain transaction to commit the game’s MMR update and apply new ratings
Once committed, the update cannot be run again for that match.
---
file: docs/pages/blitz/prize-pool.mdx
meta: {
"title": "Prize Pool & Distribution",
"description": "How $LORDS prizes are calculated and distributed in Blitz"
}
import "@/styles.css";
# Prize Pool & Distribution
Blitz distributes **$LORDS** to players at the end of every game based on their final rank. The system adapts to lobby
size, the ratio of entry fees to sponsored prizes, and how many players actually score — so payouts stay fair whether
there are 2 or 24 players in a match.
## Prize Pool Composition
The total prize pool comes from two sources:
| Source | Description |
|---|---|
| Entry fees (F) | Each player pays a $LORDS entry fee when registering for the game |
| Sponsorship (S) | Additional $LORDS added by the game host or external sponsors |
 ## Scoring System
Leaderboard placing is determined by total accumulated Victory Points (VP), a measure of a Lord's ability to explore the
map and control World Structures. Victory Points are awarded for:
* Exploring tiles
* Claiming World Structures (Essence Rifts and Camps)
* Opening Relic Crates
* Claiming Hyperstructures
* Holding Hyperstructures throughout the game
*Note: VP for claiming World Structures and Hyperstructures are only rewarded the first time a structure is captured
(from bandit forces).*
## Hyperstructure Victory Points
Hyperstructures provide ongoing Victory Points based on the number of surrounding player Realms. The VP/second earned
from holding a hyperstructure is determined by the number of Realms within 8 tiles.
## Scoring System
Leaderboard placing is determined by total accumulated Victory Points (VP), a measure of a Lord's ability to explore the
map and control World Structures. Victory Points are awarded for:
* Exploring tiles
* Claiming World Structures (Essence Rifts and Camps)
* Opening Relic Crates
* Claiming Hyperstructures
* Holding Hyperstructures throughout the game
*Note: VP for claiming World Structures and Hyperstructures are only rewarded the first time a structure is captured
(from bandit forces).*
## Hyperstructure Victory Points
Hyperstructures provide ongoing Victory Points based on the number of surrounding player Realms. The VP/second earned
from holding a hyperstructure is determined by the number of Realms within 8 tiles.
 This system rewards players who can capture hyperstructures in high-traffic areas where many players spawn, while
hyperstructures in remote locations with no nearby players provide no ongoing VP benefits. Capturing a hyperstructure
from resident bandits will always yield the VP for the feat of claiming it, even if it offers no ongoing control VP.
The number of VP awarded for each feat described above is as follows:
This system rewards players who can capture hyperstructures in high-traffic areas where many players spawn, while
hyperstructures in remote locations with no nearby players provide no ongoing VP benefits. Capturing a hyperstructure
from resident bandits will always yield the VP for the feat of claiming it, even if it offers no ongoing control VP.
The number of VP awarded for each feat described above is as follows:
| Action | VP Awarded |
|---|---|
| Explore a tile | 10 VP |
| Claim a World Structure from bandits | 500 VP |
| Open a Relic Crate | 1,000 VP |
| Claim a Hyperstructure from bandits | 3,000 VP |
| Control a Hyperstructure | 1-6 VP/second (based on no. of nearby Realms) |
 In Blitz, every action is governed by onchain physics—immutable rules encoded directly onto the blockchain, ensuring
fairness, transparency, and absolute consistency for all Lords. Here, code is law; no exceptions exist outside the
boundaries set by these protocols.
## Game Duration
Each Blitz game runs for exactly **90 minutes**.
## Time
Time within a Blitz game is measured in Eternum Days, and each is precisely six minutes in length. Each Eternum Day is
divided into six equal phases (early hours, dawn, morning, afternoon, dusk, and late evening), with each phase lasting
one minute. One day ends and the next begins every six minutes, so a single Blitz game takes place over 15 Eternum Days.
## Materials
In Blitz, materials such as food, resources, troops, and donkeys are isolated within each round. There is no bridging of
materials in and out of the game (other than Relics, which can be bridged in prior to the start of the game - *WIP
feature*). All materials have an associated weight, which determines the number of Donkeys required to move the goods
from place to place.
*Note: This guide will use 'materials' to refer to all tangible assets - i.e. food, resources, essence, labor, troops,
and donkeys. This is not to be confused with 'resources', which specifically refers to the 9 resources in Blitz.*
## Cost of Production
With the exception of food and labor, nothing in Blitz is produced for free; every unit of production demands an
input—food, labor, resources, or some combination of the three. Lords must consider these costs and effectively balance
production to ensure they can maximize their Score within the 90-minute game window.
## Travel
Transporting materials takes time and donkeys. Every transfer of materials between locations relies exclusively on these
speedy and dependable creatures. Donkeys are single-use, consumed upon completing their journey, making continuous
acquisition vital for maintaining supply chains.
Troops can also be moved between player-owned structures using donkeys, but to dominate your enemies and ensure security
of your lands, troops must be deployed to an army on the world map. Once troops are deployed, they cannot be taken back
into the inventory. Their mobility is then governed by stamina, limiting the distance they can travel and the number of
actions they can perform. Traveling between hexes or initiating an attack expends valuable stamina points, which are
partially replenished each Eternum Day.
## Hexes
Blitz unfolds across a procedurally generated, hexagonal-tile world map. This represents the physical space of the world
and defines spawn locations, biome distribution, and distances between Realms and other World Structures. This is the
layer in which armies explore, fight, and capture, and is explorable in the 'World' view.
Zooming in, each Realm hex is broken up into smaller hexes which define the local area and building placement. Here in
the 'Local' view, Lords can plan out their building placement and closely manage their population, supply chain, and
production.
## Biomes
Each hexagonal tile on the world map possesses a distinct biome. Each troop type responds uniquely to these varied
terrains, gaining or losing combat efficiency and stamina based on their affinity with different biomes. Successful
Lords must master biome knowledge to exploit strategic advantages or avoid costly missteps.
In Blitz, every action is governed by onchain physics—immutable rules encoded directly onto the blockchain, ensuring
fairness, transparency, and absolute consistency for all Lords. Here, code is law; no exceptions exist outside the
boundaries set by these protocols.
## Game Duration
Each Blitz game runs for exactly **90 minutes**.
## Time
Time within a Blitz game is measured in Eternum Days, and each is precisely six minutes in length. Each Eternum Day is
divided into six equal phases (early hours, dawn, morning, afternoon, dusk, and late evening), with each phase lasting
one minute. One day ends and the next begins every six minutes, so a single Blitz game takes place over 15 Eternum Days.
## Materials
In Blitz, materials such as food, resources, troops, and donkeys are isolated within each round. There is no bridging of
materials in and out of the game (other than Relics, which can be bridged in prior to the start of the game - *WIP
feature*). All materials have an associated weight, which determines the number of Donkeys required to move the goods
from place to place.
*Note: This guide will use 'materials' to refer to all tangible assets - i.e. food, resources, essence, labor, troops,
and donkeys. This is not to be confused with 'resources', which specifically refers to the 9 resources in Blitz.*
## Cost of Production
With the exception of food and labor, nothing in Blitz is produced for free; every unit of production demands an
input—food, labor, resources, or some combination of the three. Lords must consider these costs and effectively balance
production to ensure they can maximize their Score within the 90-minute game window.
## Travel
Transporting materials takes time and donkeys. Every transfer of materials between locations relies exclusively on these
speedy and dependable creatures. Donkeys are single-use, consumed upon completing their journey, making continuous
acquisition vital for maintaining supply chains.
Troops can also be moved between player-owned structures using donkeys, but to dominate your enemies and ensure security
of your lands, troops must be deployed to an army on the world map. Once troops are deployed, they cannot be taken back
into the inventory. Their mobility is then governed by stamina, limiting the distance they can travel and the number of
actions they can perform. Traveling between hexes or initiating an attack expends valuable stamina points, which are
partially replenished each Eternum Day.
## Hexes
Blitz unfolds across a procedurally generated, hexagonal-tile world map. This represents the physical space of the world
and defines spawn locations, biome distribution, and distances between Realms and other World Structures. This is the
layer in which armies explore, fight, and capture, and is explorable in the 'World' view.
Zooming in, each Realm hex is broken up into smaller hexes which define the local area and building placement. Here in
the 'Local' view, Lords can plan out their building placement and closely manage their population, supply chain, and
production.
## Biomes
Each hexagonal tile on the world map possesses a distinct biome. Each troop type responds uniquely to these varied
terrains, gaining or losing combat efficiency and stamina based on their affinity with different biomes. Successful
Lords must master biome knowledge to exploit strategic advantages or avoid costly missteps.
 ---
file: docs/pages/blitz/world-structures.mdx
meta: {}
import ResourceIcon from "@/components/ResourceIcon";
import { table } from "@/components/styles";
# 🏗️ World Structures
All World Structures in Blitz are initially occupied by bandit forces that must be defeated by a player before it can be
claimed. Bandit garrisons range from **800 to 1,600 troops**.
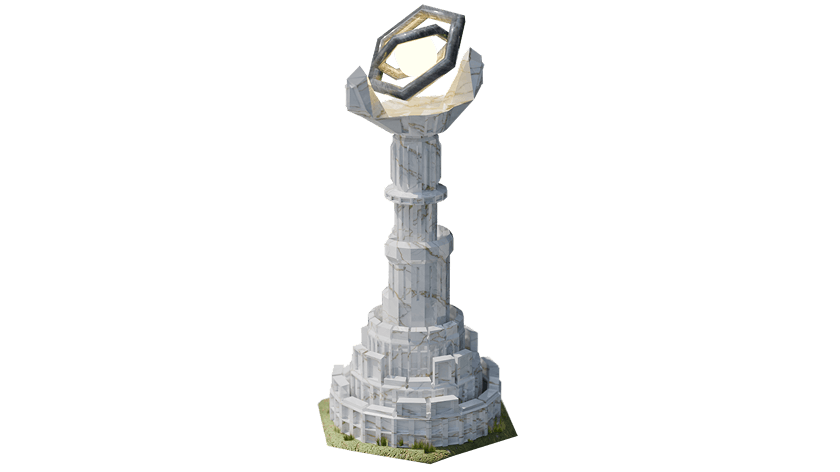
## Hyperstructures
In Blitz, Hyperstructures are **fully constructed** and positioned around the map at the start of the game, ready to be
claimed by eliminating the resident bandit forces. There is no construction process - Hyperstructures are immediately
functional once claimed and will begin accumulating Victory Points for the owning player.
---
file: docs/pages/blitz/world-structures.mdx
meta: {}
import ResourceIcon from "@/components/ResourceIcon";
import { table } from "@/components/styles";
# 🏗️ World Structures
All World Structures in Blitz are initially occupied by bandit forces that must be defeated by a player before it can be
claimed. Bandit garrisons range from **800 to 1,600 troops**.
## Hyperstructures
In Blitz, Hyperstructures are **fully constructed** and positioned around the map at the start of the game, ready to be
claimed by eliminating the resident bandit forces. There is no construction process - Hyperstructures are immediately
functional once claimed and will begin accumulating Victory Points for the owning player.
 The number of Hyperstructures in the game, and their positioning on the world map, is explained in the
[World Map](/blitz/worldmap-movement/worldmap) section.
## Essence Rifts
The number of Hyperstructures in the game, and their positioning on the world map, is explained in the
[World Map](/blitz/worldmap-movement/worldmap) section.
## Essence Rifts
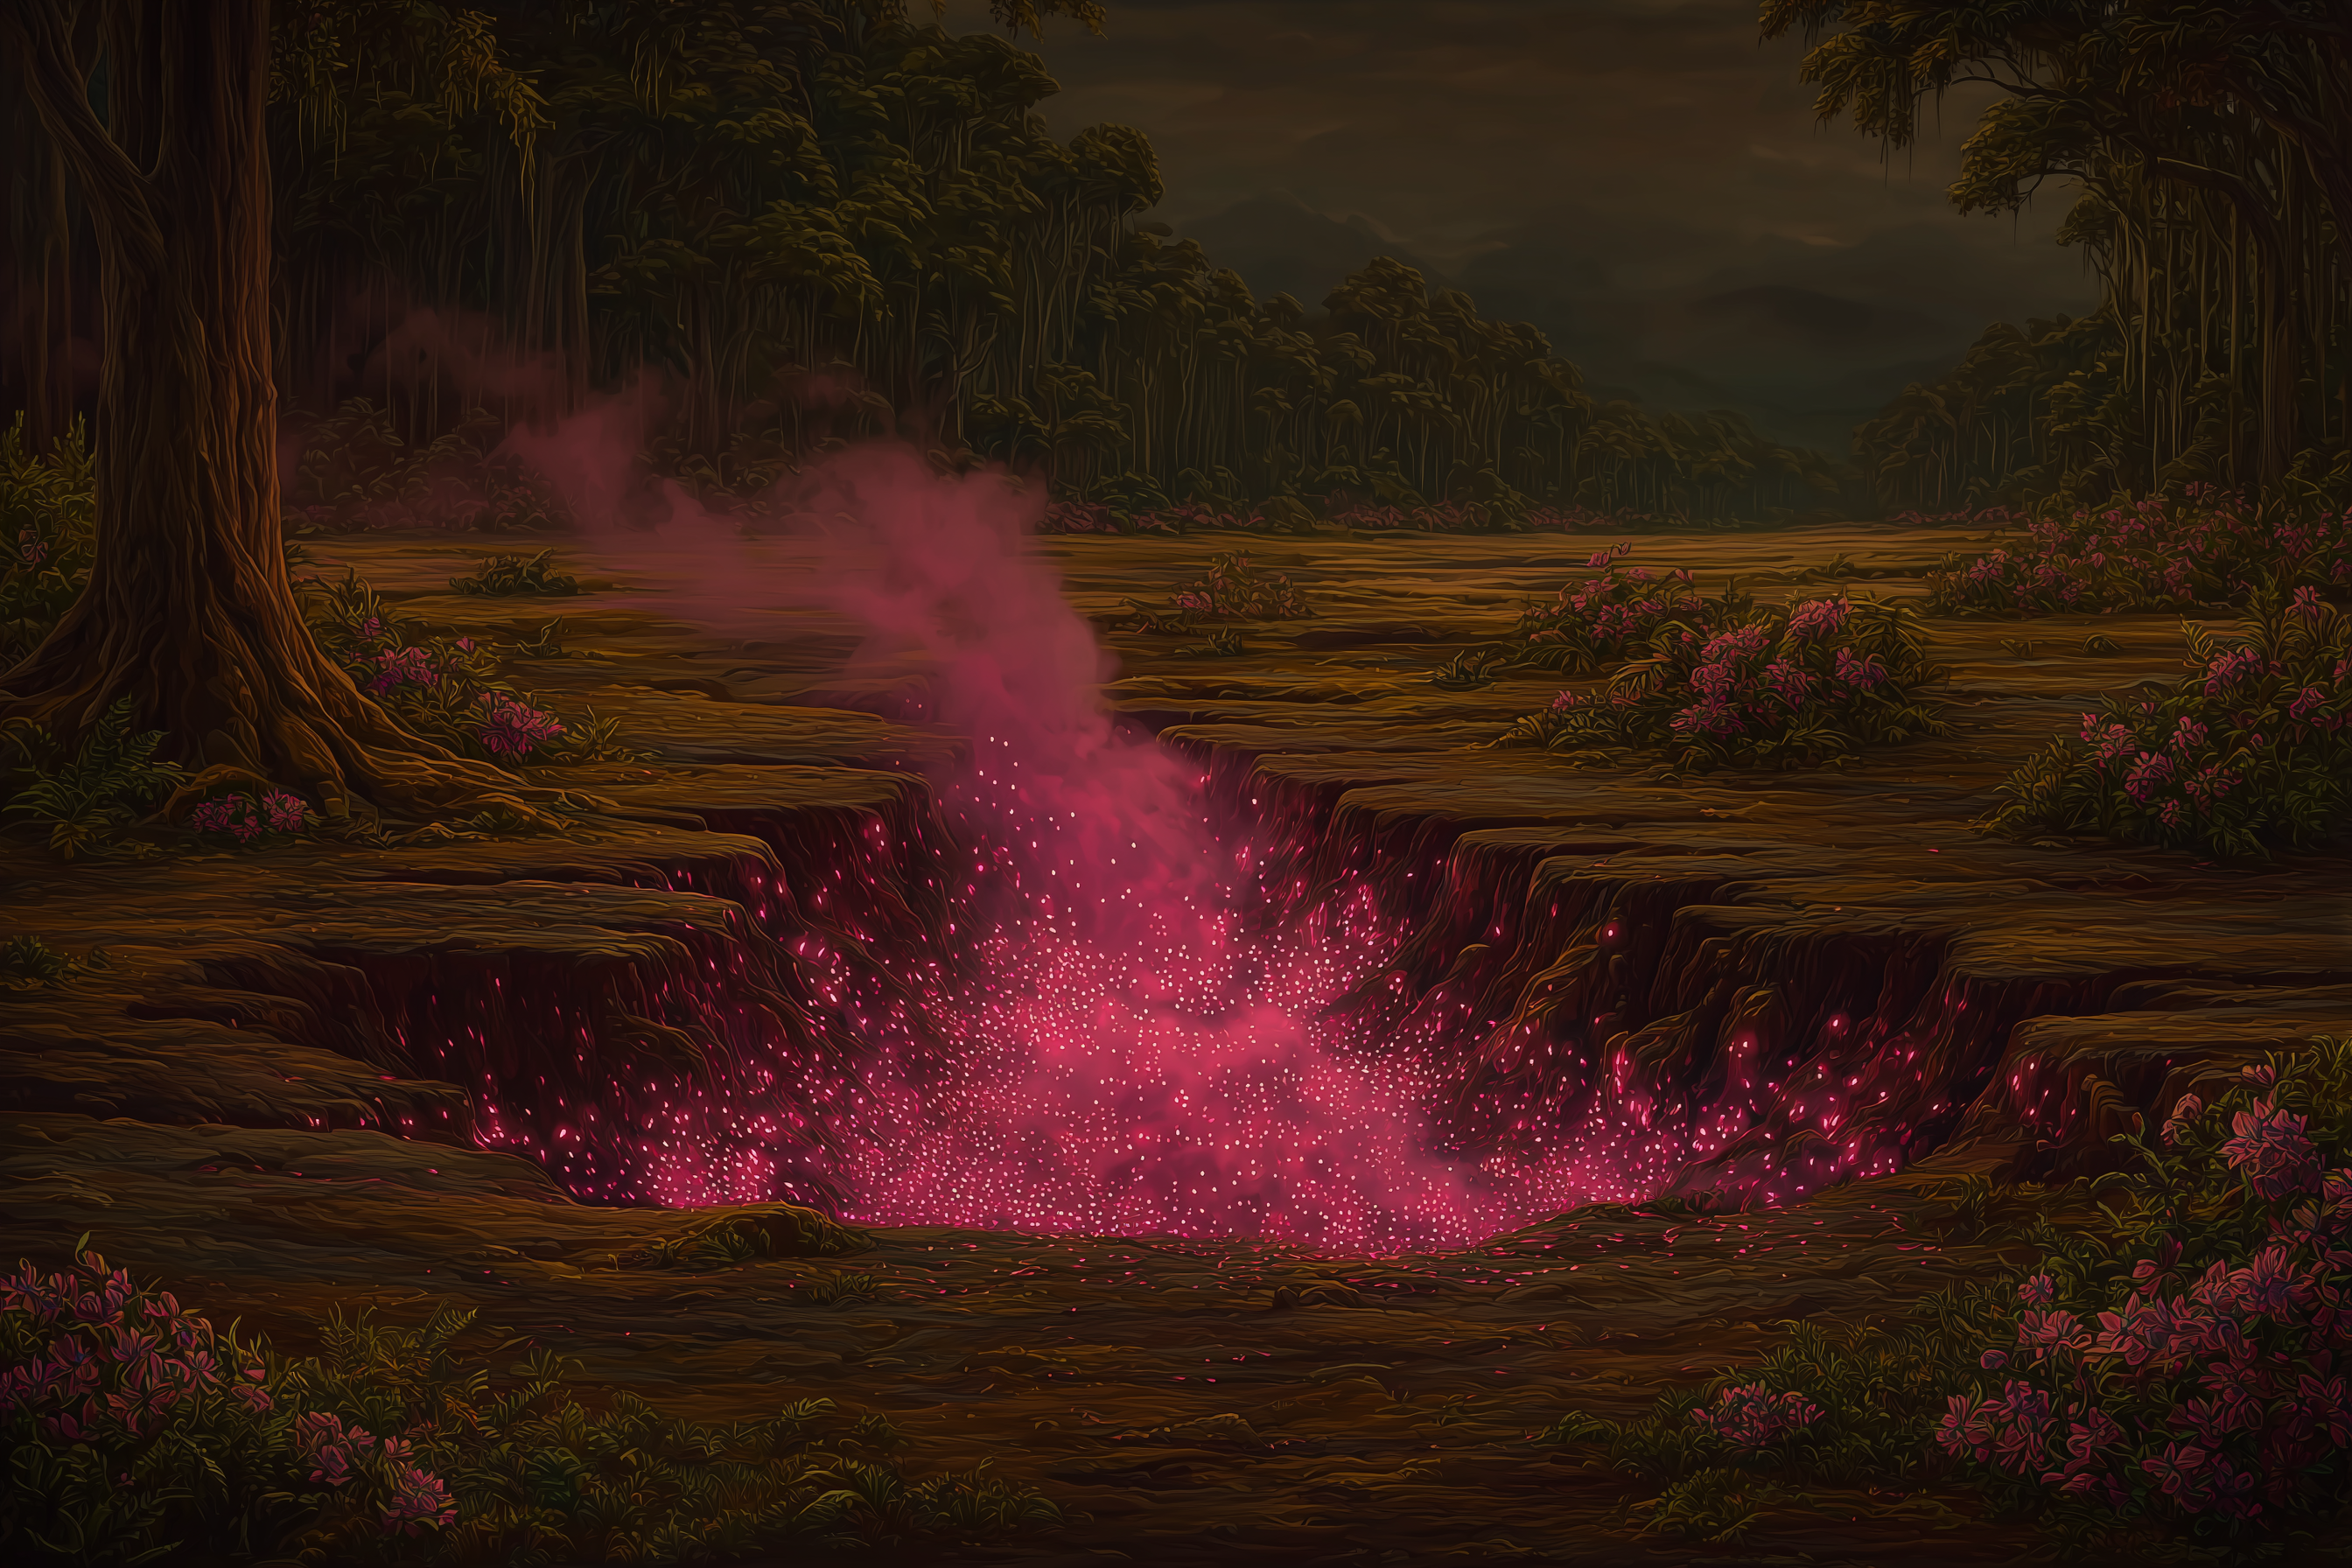 Essence Rifts are striking fissures in the earth where valuable Essence has swelled from beneath the surface. These
locations provide a steady source of the valuable dust to the owning player, reducing the need to explore new hexes for
continued Realm expansion and troop production. Essence Rifts produce Essence at a rate of 10 units per second from the
moment they're discovered. Lords have a 1/50 chance of finding one of these structures when exploring a hex.
## Camps
Camps act in a similar capacity to Villages in Eternum, in the sense that they perform as small, discoverable Realms
that can boost production and act as forward bases. Camps are restricted to the Settlement level and cannot be upgraded.
Once claimed, Camps can construct buildings, store troops and materials in their inventory, deploy defensive guards, and
create one field army. Lords have a 1/30 chance of finding one of these structures when exploring a hex.
### Starting Materials
When a camp is claimed, it spawns with an initial stockpile of materials.
Essence Rifts are striking fissures in the earth where valuable Essence has swelled from beneath the surface. These
locations provide a steady source of the valuable dust to the owning player, reducing the need to explore new hexes for
continued Realm expansion and troop production. Essence Rifts produce Essence at a rate of 10 units per second from the
moment they're discovered. Lords have a 1/50 chance of finding one of these structures when exploring a hex.
## Camps
Camps act in a similar capacity to Villages in Eternum, in the sense that they perform as small, discoverable Realms
that can boost production and act as forward bases. Camps are restricted to the Settlement level and cannot be upgraded.
Once claimed, Camps can construct buildings, store troops and materials in their inventory, deploy defensive guards, and
create one field army. Lords have a 1/30 chance of finding one of these structures when exploring a hex.
### Starting Materials
When a camp is claimed, it spawns with an initial stockpile of materials.
| Resource | Amount |
|---|---|
|
|
500 |
|
|
2,500 |
|
|
200 |
Current Account: {account.account.address}
 ## Prerequisites
* [Dojo onchain game engine](https://book.dojoengine.org) v1.0.4
* [Node.js](https://nodejs.org/)
* [pnpm](https://pnpm.io/) v9.12.3
* [Bun](https://bun.sh/)
## Setup
Install Dojo via:
```bash
curl -L https://install.dojoengine.org | bash
```
Eternum uses a pnpm workspace and bun for scripts to allow easy npm packages to be created. Install pnpm:
```bash
npm install -g pnpm
```
Install project dependencies:
```bash
pnpm install
```
Build shared packages:
```bash
pnpm run build:packages
```
## Development Scripts
### Development
* `pnpm dev` - Start game development server
* `pnpm dev:docs` - Start documentation development server
* `pnpm dev:landing` - Start landing page development server
### Building
* `pnpm build` - Build game client
* `pnpm build:docs` - Build documentation
* `pnpm build:landing` - Build landing page
* `pnpm build:packages` - Build shared packages
### Testing & Linting
* `pnpm test` - Run all tests
* `pnpm lint` - Run linting
* `pnpm format` - Format code
* `pnpm format:check` - Check code formatting
## Contract Deployment
Eternum supports multiple deployment environments:
## Prerequisites
* [Dojo onchain game engine](https://book.dojoengine.org) v1.0.4
* [Node.js](https://nodejs.org/)
* [pnpm](https://pnpm.io/) v9.12.3
* [Bun](https://bun.sh/)
## Setup
Install Dojo via:
```bash
curl -L https://install.dojoengine.org | bash
```
Eternum uses a pnpm workspace and bun for scripts to allow easy npm packages to be created. Install pnpm:
```bash
npm install -g pnpm
```
Install project dependencies:
```bash
pnpm install
```
Build shared packages:
```bash
pnpm run build:packages
```
## Development Scripts
### Development
* `pnpm dev` - Start game development server
* `pnpm dev:docs` - Start documentation development server
* `pnpm dev:landing` - Start landing page development server
### Building
* `pnpm build` - Build game client
* `pnpm build:docs` - Build documentation
* `pnpm build:landing` - Build landing page
* `pnpm build:packages` - Build shared packages
### Testing & Linting
* `pnpm test` - Run all tests
* `pnpm lint` - Run linting
* `pnpm format` - Format code
* `pnpm format:check` - Check code formatting
## Contract Deployment
Eternum supports multiple deployment environments:
 * [Contracts](/development/contracts): built using the Dojo framework. This leverages the ECS model, allowing us to
build quick and ship fast. It revolves around 3 units: Entities, Components (called Models in Dojo) and Systems (more
about this in the Dojo book).
* [Client](/development/client): our client is built using React with Typescript. We leverage Dojo by using DojoJS
* [Eternum SDK](/development/sdk): our SDK contains most notably the getter and setter of the configuration of Eternum,
the EternumProvider and most of the constants/types of the world that needed to be transcribed to Typescript.
* [Torii](https://book.dojoengine.org/toolchain/torii): Dojo's indexer, optimized for that particular framework and well
integrated into the stack. From our client, we have a gRPC subscription set up through DojoJS and recs to events.
Events are fired in the contracts as a way for the indexer to know what's going on in the world. Every time an entity
is created, updated, or deleted, an event is fired which updated Torii's record of the world.
* [DojoJS and recs](https://github.com/dojoengine/dojo.js?tab=readme-ov-file#contributing-to-dojojs): DojoJS is the SDK
that allows easy integration of a Dojo app into your client/node backend. Recs are DojoJS's way of exposing the state
of the world to the client. This is done via queries to the Recs state using a simple query language, which doesn't
support complex queries yet (e.g. joins, gt, lt, etc...).
---
file: docs/pages/development/index.mdx
meta: {
"layout": "docs"
}
# Development
* [Getting Started](/development/getting-started)
* [Axis Overview](/development/axis/overview)
* [Axis Install and Run](/development/axis/install-and-run)
* [Axis Worlds and Auth](/development/axis/worlds-and-auth)
* [Axis Headless and API](/development/axis/headless-and-api)
* [Axis Configuration and Operations](/development/axis/configuration-and-operations)
* [Axis CLI Reference](/development/axis/cli-reference)
* [Client](/development/client)
* [Contracts](/development/contracts)
* [SDK](/development/sdk)
* [Collaborators](/development/collaborators)
---
file: docs/pages/development/llm.mdx
meta: {
"title": "LLM"
}
# LLM
These docs are experted at [https://docs.eternum.realms.world/llm.txt](https://docs.eternum.realms.world/llm.txt) for
consumption by the LLM.
---
file: docs/pages/development/sdk.mdx
meta: {}
# SDK
## Compiling
From the root of the project, run:
```bash
pnpm i && pnpm run build:packages
```
## Structure
This SDK contains most notably the getter and setter of the configuration of Eternum, the EternumProvider and most of
the constants/types of the world that needed to be transcribed to Typescript.
Everything considered as client agnostic should be in there. The main reason for this separation is to be able to re-use
this logic in any other project that uses Typescript, e.g. new mobile client, data analytics app, etc.
---
file: docs/pages/eternum/achievements.mdx
meta: {}
# Achievements & Quests
*WIP*
---
file: docs/pages/eternum/game-entry.mdx
meta: {
"title": "Game Entry",
"description": "How to join Eternum via Season Passes and Villages"
}
# Game Entry
Eternum takes place in 'Seasons', multi-week campaigns with long-term strategic and diplomatic developments. There are
several weeks between each season that allow for iterative development and feature expansion in each subsequent season.
## Realms NFT Holder Entry
* [Contracts](/development/contracts): built using the Dojo framework. This leverages the ECS model, allowing us to
build quick and ship fast. It revolves around 3 units: Entities, Components (called Models in Dojo) and Systems (more
about this in the Dojo book).
* [Client](/development/client): our client is built using React with Typescript. We leverage Dojo by using DojoJS
* [Eternum SDK](/development/sdk): our SDK contains most notably the getter and setter of the configuration of Eternum,
the EternumProvider and most of the constants/types of the world that needed to be transcribed to Typescript.
* [Torii](https://book.dojoengine.org/toolchain/torii): Dojo's indexer, optimized for that particular framework and well
integrated into the stack. From our client, we have a gRPC subscription set up through DojoJS and recs to events.
Events are fired in the contracts as a way for the indexer to know what's going on in the world. Every time an entity
is created, updated, or deleted, an event is fired which updated Torii's record of the world.
* [DojoJS and recs](https://github.com/dojoengine/dojo.js?tab=readme-ov-file#contributing-to-dojojs): DojoJS is the SDK
that allows easy integration of a Dojo app into your client/node backend. Recs are DojoJS's way of exposing the state
of the world to the client. This is done via queries to the Recs state using a simple query language, which doesn't
support complex queries yet (e.g. joins, gt, lt, etc...).
---
file: docs/pages/development/index.mdx
meta: {
"layout": "docs"
}
# Development
* [Getting Started](/development/getting-started)
* [Axis Overview](/development/axis/overview)
* [Axis Install and Run](/development/axis/install-and-run)
* [Axis Worlds and Auth](/development/axis/worlds-and-auth)
* [Axis Headless and API](/development/axis/headless-and-api)
* [Axis Configuration and Operations](/development/axis/configuration-and-operations)
* [Axis CLI Reference](/development/axis/cli-reference)
* [Client](/development/client)
* [Contracts](/development/contracts)
* [SDK](/development/sdk)
* [Collaborators](/development/collaborators)
---
file: docs/pages/development/llm.mdx
meta: {
"title": "LLM"
}
# LLM
These docs are experted at [https://docs.eternum.realms.world/llm.txt](https://docs.eternum.realms.world/llm.txt) for
consumption by the LLM.
---
file: docs/pages/development/sdk.mdx
meta: {}
# SDK
## Compiling
From the root of the project, run:
```bash
pnpm i && pnpm run build:packages
```
## Structure
This SDK contains most notably the getter and setter of the configuration of Eternum, the EternumProvider and most of
the constants/types of the world that needed to be transcribed to Typescript.
Everything considered as client agnostic should be in there. The main reason for this separation is to be able to re-use
this logic in any other project that uses Typescript, e.g. new mobile client, data analytics app, etc.
---
file: docs/pages/eternum/achievements.mdx
meta: {}
# Achievements & Quests
*WIP*
---
file: docs/pages/eternum/game-entry.mdx
meta: {
"title": "Game Entry",
"description": "How to join Eternum via Season Passes and Villages"
}
# Game Entry
Eternum takes place in 'Seasons', multi-week campaigns with long-term strategic and diplomatic developments. There are
several weeks between each season that allow for iterative development and feature expansion in each subsequent season.
## Realms NFT Holder Entry  Realms NFT holders have the exclusive benefit of free entry into each season of Eternum through the minting of Season
Passes. Each Season Pass is unique to the Realm it was minted from and allows the holder to initiate a settling
transaction to enter the game. To do this, Lords must first mint the Season Pass
[here](https://empire.realms.world/mint) using the wallet that contains the Realms NFT, then transfer the Season Pass to
their [Cartridge Wallet](/overview/controller).
## Non-Realm Holder Entry
⚖️ **Season Pass Marketplace**
Should a Realm NFT holder decide not to use their Season Pass, they can transfer it or sell it on the
[Season Pass Marketplace](https://empire.realms.world/trade), providing an avenue for non-Realm holders to acquire
Season Passes to participate in the game.
🏕️ **Villages**
Villages are modest outposts that can be established around settled Realms, offering an accessible entry point into
Eternum. Villages have some restrictions but offer a low-cost, casual taste of Eternum gameplay to newcomers while also
acting as an avenue for established players to expand their production. Each Realm can support up to six surrounding
Villages.
For detailed information about Villages, including settling mechanics, resource production, and progression paths, visit
our [Villages guide](/eternum/realm-and-villages/villages).
## Realm Control Mechanics
As long as you maintain control of a settled Realm or Village, you can actively participate without additional entry
fees, engage in the market using **$LORDS** tokens, and enjoy uninterrupted gameplay until the end of the season.
However, Eternum is a high-stakes game, it can be unforgiving and players must accept that their valuable holdings may
become a target for other players. Thankfully, the game offers high-stakes and low-stakes gameplay to ensure that
players can participate in the world at their own pace and risk tolerance.
⚔️ **Realms - High Stakes**
Once settled, Realms can be conquered and claimed within a Season, transferring control to the conqueror. Realms are the
key playing pieces in Eternum and allow for the full gameplay experience in producing resources, training armies,
conducting trade, and pursuing territorial expansion. This level of capability comes with increased risk, as Realms must
continually manage defenses, alliances, and strategic positioning to protect themselves from rivals.
🌴 **Villages - Low Stakes**
Unlike Realms, Villages cannot be conquered by other players, making them an ideal choice for casual players seeking a
lower-risk gameplay experience. Villages can still participate in most gameplay activities, but production rates are
limited to 50% the rate of Realms and progression paths are limited. These features make Villages perfect for new
players looking to learn the game mechanics without the constant threat of conquest.
---
file: docs/pages/eternum/key-concepts.mdx
meta: {
"title": "Key Concepts",
"description": "The foundational mechanics of Eternum"
}
# 🔑 Key Concepts
This section outlines the core mechanics and systems that form the foundation of Eternum's gameplay.
## Realms
* **Limited Assets**: 8,000 unique and irreplaceable Realms serve as the foundation of Eternum, each has the ability to
freely mint a Season Pass.
* **Settling**: Players must burn a Season Pass to settle their Realm in the game world.
* **Starting Materials**: Each newly settled Realm begins with a set of starting materials.
* **Progression Path**: Realms can upgrade from Settlements → Cities → Kingdoms → Empires, unlocking additional
buildable hexes and defensive army slots.
* **Resource Production**: Each Realm can produce 1-7 different resources based on the original Realms NFT metadata.
* **Wonders**: Realms with Wonders have a 20% production bonus and share this bonus with all Realms and Villages in a
12- tile radius.
* **Hardcore Gameplay**: If a Realm’s defenses crumble, it can be claimed by another player—transferring gameplay rights
to the conqueror.
## Villages
* **Accessible Entry**: Villages can be established around settled Realms, offering a simple entry system for new
players
* **Scaling**: Up to 6 Villages per Realm, allowing for 48,000 Villages in Season 1
* **Limited Production**: Produce materials at 50% the rate of Realms and only have access to 1 resource type each
* **Parent Realm**: Each Village is tied to a parent Realm and will pay bridging fees if moving materials out of the
game
* **Troop Restrictions**: Villages may only receive tokenized troops from their parent Realm, they cannot buy or be sent
troops from any other source
* **Simple Progression**: Villages have a limited upgrade path from Settlement to City
* **Casual Gameplay**: Villages can be raided, but can’t be claimed by other players.
## Materials
* **Materials Categories**:
* **Food**: (Wheat, Fish) - essential for production, troop movement, and construction.
* **Resources**: 22 different resource types, distributed based on rarity across both Realms and Villages.
* **Troops**: Units with unique properties that can be assigned to armies.
* **Donkeys**: Required for moving materials around the world, essential for logistics.
* **Labor**: A new material in S1 that allows players to build and produce in 'simple mode', acquired through burning
resources.
* **Ancient Fragments**: Found in-game, critical for the construction of Hyperstructures.
* **ERC20 Compatibility**: All materials (except Labor) can be traded freely and bridged out as ERC20 tokens through
Realms.
## Buildings
* **Construction Modes**: Two building systems available - Standard (resource-efficient) and Simple (labor-focused).
* **Building Types**:
* **The Keep**: Central structure automatically constructed when settling, provides baseline population capacity.
* **Resource Buildings**: Specific buildings for each of the 22 resources, only requiring food to construct.
* **Economic Buildings**: Includes Farms, Fishing Villages, Worker Huts, Storehouses, and Markets.
* **Military Buildings**: Nine different buildings for producing three tiers of each troop type.
* **Placement & Population**: Buildings require buildable hexes and population capacity, with more unlocked as Realms
and Villages are upgraded.
## Production
* **Production Modes**: Like buildings, production can be done in Standard (resource-intensive) or Simple (food and
labor) mode.
* **Production Types**:
* **Food**: The only resources (Wheat, Fish) that can be produced without inputs.
* **Resources**: Require combinations of other resources (standard) or labor (simple).
* **Labor**: Produced by burning resources in the Keep, used for simple mode construction and production.
* **Troops**: Essential for exploration and warfare, with higher tiers requiring lower tier troops as inputs.
* **Donkeys**: One-time-use transport, consumed after a single journey.
## World Map
* **Exploration System**: The world begins shrouded in mystery, with only the six Banks visible at season start;
adjacent hexes are revealed when settling, and armies can explore to reveal new areas.
* **Biomes**: 16 unique biome types procedurally generated across the map, each affecting combat effectiveness and troop
movement.
* **Movement & Stamina**: Armies move using stamina (regenerating at +2 per Phase, +12 per Eternum Day), with costs
varying by biome and troop type; Knights, Crossbowmen, and Paladins each have different maximum stamina capacities.
* **Exploration Mechanics**: Exploring costs 30 stamina per hex and reveals that area permanently to all Lords;
exploring armies may discover resources or encounter world structures and agent armies.
## Military
Realms NFT holders have the exclusive benefit of free entry into each season of Eternum through the minting of Season
Passes. Each Season Pass is unique to the Realm it was minted from and allows the holder to initiate a settling
transaction to enter the game. To do this, Lords must first mint the Season Pass
[here](https://empire.realms.world/mint) using the wallet that contains the Realms NFT, then transfer the Season Pass to
their [Cartridge Wallet](/overview/controller).
## Non-Realm Holder Entry
⚖️ **Season Pass Marketplace**
Should a Realm NFT holder decide not to use their Season Pass, they can transfer it or sell it on the
[Season Pass Marketplace](https://empire.realms.world/trade), providing an avenue for non-Realm holders to acquire
Season Passes to participate in the game.
🏕️ **Villages**
Villages are modest outposts that can be established around settled Realms, offering an accessible entry point into
Eternum. Villages have some restrictions but offer a low-cost, casual taste of Eternum gameplay to newcomers while also
acting as an avenue for established players to expand their production. Each Realm can support up to six surrounding
Villages.
For detailed information about Villages, including settling mechanics, resource production, and progression paths, visit
our [Villages guide](/eternum/realm-and-villages/villages).
## Realm Control Mechanics
As long as you maintain control of a settled Realm or Village, you can actively participate without additional entry
fees, engage in the market using **$LORDS** tokens, and enjoy uninterrupted gameplay until the end of the season.
However, Eternum is a high-stakes game, it can be unforgiving and players must accept that their valuable holdings may
become a target for other players. Thankfully, the game offers high-stakes and low-stakes gameplay to ensure that
players can participate in the world at their own pace and risk tolerance.
⚔️ **Realms - High Stakes**
Once settled, Realms can be conquered and claimed within a Season, transferring control to the conqueror. Realms are the
key playing pieces in Eternum and allow for the full gameplay experience in producing resources, training armies,
conducting trade, and pursuing territorial expansion. This level of capability comes with increased risk, as Realms must
continually manage defenses, alliances, and strategic positioning to protect themselves from rivals.
🌴 **Villages - Low Stakes**
Unlike Realms, Villages cannot be conquered by other players, making them an ideal choice for casual players seeking a
lower-risk gameplay experience. Villages can still participate in most gameplay activities, but production rates are
limited to 50% the rate of Realms and progression paths are limited. These features make Villages perfect for new
players looking to learn the game mechanics without the constant threat of conquest.
---
file: docs/pages/eternum/key-concepts.mdx
meta: {
"title": "Key Concepts",
"description": "The foundational mechanics of Eternum"
}
# 🔑 Key Concepts
This section outlines the core mechanics and systems that form the foundation of Eternum's gameplay.
## Realms
* **Limited Assets**: 8,000 unique and irreplaceable Realms serve as the foundation of Eternum, each has the ability to
freely mint a Season Pass.
* **Settling**: Players must burn a Season Pass to settle their Realm in the game world.
* **Starting Materials**: Each newly settled Realm begins with a set of starting materials.
* **Progression Path**: Realms can upgrade from Settlements → Cities → Kingdoms → Empires, unlocking additional
buildable hexes and defensive army slots.
* **Resource Production**: Each Realm can produce 1-7 different resources based on the original Realms NFT metadata.
* **Wonders**: Realms with Wonders have a 20% production bonus and share this bonus with all Realms and Villages in a
12- tile radius.
* **Hardcore Gameplay**: If a Realm’s defenses crumble, it can be claimed by another player—transferring gameplay rights
to the conqueror.
## Villages
* **Accessible Entry**: Villages can be established around settled Realms, offering a simple entry system for new
players
* **Scaling**: Up to 6 Villages per Realm, allowing for 48,000 Villages in Season 1
* **Limited Production**: Produce materials at 50% the rate of Realms and only have access to 1 resource type each
* **Parent Realm**: Each Village is tied to a parent Realm and will pay bridging fees if moving materials out of the
game
* **Troop Restrictions**: Villages may only receive tokenized troops from their parent Realm, they cannot buy or be sent
troops from any other source
* **Simple Progression**: Villages have a limited upgrade path from Settlement to City
* **Casual Gameplay**: Villages can be raided, but can’t be claimed by other players.
## Materials
* **Materials Categories**:
* **Food**: (Wheat, Fish) - essential for production, troop movement, and construction.
* **Resources**: 22 different resource types, distributed based on rarity across both Realms and Villages.
* **Troops**: Units with unique properties that can be assigned to armies.
* **Donkeys**: Required for moving materials around the world, essential for logistics.
* **Labor**: A new material in S1 that allows players to build and produce in 'simple mode', acquired through burning
resources.
* **Ancient Fragments**: Found in-game, critical for the construction of Hyperstructures.
* **ERC20 Compatibility**: All materials (except Labor) can be traded freely and bridged out as ERC20 tokens through
Realms.
## Buildings
* **Construction Modes**: Two building systems available - Standard (resource-efficient) and Simple (labor-focused).
* **Building Types**:
* **The Keep**: Central structure automatically constructed when settling, provides baseline population capacity.
* **Resource Buildings**: Specific buildings for each of the 22 resources, only requiring food to construct.
* **Economic Buildings**: Includes Farms, Fishing Villages, Worker Huts, Storehouses, and Markets.
* **Military Buildings**: Nine different buildings for producing three tiers of each troop type.
* **Placement & Population**: Buildings require buildable hexes and population capacity, with more unlocked as Realms
and Villages are upgraded.
## Production
* **Production Modes**: Like buildings, production can be done in Standard (resource-intensive) or Simple (food and
labor) mode.
* **Production Types**:
* **Food**: The only resources (Wheat, Fish) that can be produced without inputs.
* **Resources**: Require combinations of other resources (standard) or labor (simple).
* **Labor**: Produced by burning resources in the Keep, used for simple mode construction and production.
* **Troops**: Essential for exploration and warfare, with higher tiers requiring lower tier troops as inputs.
* **Donkeys**: One-time-use transport, consumed after a single journey.
## World Map
* **Exploration System**: The world begins shrouded in mystery, with only the six Banks visible at season start;
adjacent hexes are revealed when settling, and armies can explore to reveal new areas.
* **Biomes**: 16 unique biome types procedurally generated across the map, each affecting combat effectiveness and troop
movement.
* **Movement & Stamina**: Armies move using stamina (regenerating at +2 per Phase, +12 per Eternum Day), with costs
varying by biome and troop type; Knights, Crossbowmen, and Paladins each have different maximum stamina capacities.
* **Exploration Mechanics**: Exploring costs 30 stamina per hex and reveals that area permanently to all Lords;
exploring armies may discover resources or encounter world structures and agent armies.
## Military
 * **Army Composition**: Armies consist of a single troop type and tier (Knights, Crossbowmen, or Paladins).
* **Troop Tiers**: T1, T2, and T3 troops with increasing combat strength.
* **Combat Factors**: Battles resolved based on army damage, stamina modifiers, and biome effects.
* **Army Types**:
* **Field Armies**: Deploy onto the world map for exploration and conquest.
* **Guard Armies**: Deployed to defense slots to protect structures.
* **Stamina System**: Armies recover +2 stamina per Phase (6 phases per Eternum Day, totaling +12 stamina per day).
* **Biome Effects**: Each troop type has advantages (+30% damage), disadvantages (-30% damage), or no change (0%) in
specific biomes.
* **Raiding Mechanics**: Armies can attempt to steal resources from structures without defeating defenders.
* Success depends on the raiding army's damage relative to the combined guard armies.
* Undefended structures can be raided without casualties.
## Tribes
Tribes are player-formed organizations enabling cooperation and coordination. They can be made public (open to all) or
private (invitation only) and allow players access to tribe-only features. Tribes are an early form of social structures
within Eternum and rely on player-driven interactions including arrangements of alliances and declarations of war.
## Victory Conditions
Eternum's seasonal gameplay culminates in victory through the accumulation of victory points earned through the
construction and ownership of Hyperstructures. However, there are various achievement paths, with players earning
recognition and rewards for various actions within the Season.
---
file: docs/pages/eternum/prize-pool.mdx
meta: {}
import { table } from "@/components/styles";
# 💰 Prize Pool
## Overview
In Season 1 of Eternum, there are four prize categories with a total of:
* 1,000,000 $LORDS tokens
* 100,000 $STRK tokens
> **Note:** All Season 1 prizes will be distributed manually by the development team (except for the agent rewards which
> are collected directly in-game). Future seasons will implement automated distribution through game contracts, aligning
> with decentralized gaming principles.
## Prize Categories
### 1. Victory Prizes
**Total: 300,000 $LORDS + 50,000 $STRK**
These prizes are awarded to top-performing tribes based on victory points. Additionally, 2.5% of all $LORDS bridging
volume is collected as a fee and added to the prize pool, further increasing the total rewards available.
#### How to Earn Victory Points
Players can earn victory points by:
* Contributing resources and labor to hyperstructure construction
* Holding shares in completed hyperstructures to accumulate emitted victory points
#### Distribution
Once a player triggers the end of the game (or the game contract breaks), a snapshot of tribes, their members, and the
victory point leaderboard is taken. Tribes will then be ranked by the cumulative number of victory points of their
players. The top 10 tribes receive prizes based on this allocation:
* **Army Composition**: Armies consist of a single troop type and tier (Knights, Crossbowmen, or Paladins).
* **Troop Tiers**: T1, T2, and T3 troops with increasing combat strength.
* **Combat Factors**: Battles resolved based on army damage, stamina modifiers, and biome effects.
* **Army Types**:
* **Field Armies**: Deploy onto the world map for exploration and conquest.
* **Guard Armies**: Deployed to defense slots to protect structures.
* **Stamina System**: Armies recover +2 stamina per Phase (6 phases per Eternum Day, totaling +12 stamina per day).
* **Biome Effects**: Each troop type has advantages (+30% damage), disadvantages (-30% damage), or no change (0%) in
specific biomes.
* **Raiding Mechanics**: Armies can attempt to steal resources from structures without defeating defenders.
* Success depends on the raiding army's damage relative to the combined guard armies.
* Undefended structures can be raided without casualties.
## Tribes
Tribes are player-formed organizations enabling cooperation and coordination. They can be made public (open to all) or
private (invitation only) and allow players access to tribe-only features. Tribes are an early form of social structures
within Eternum and rely on player-driven interactions including arrangements of alliances and declarations of war.
## Victory Conditions
Eternum's seasonal gameplay culminates in victory through the accumulation of victory points earned through the
construction and ownership of Hyperstructures. However, there are various achievement paths, with players earning
recognition and rewards for various actions within the Season.
---
file: docs/pages/eternum/prize-pool.mdx
meta: {}
import { table } from "@/components/styles";
# 💰 Prize Pool
## Overview
In Season 1 of Eternum, there are four prize categories with a total of:
* 1,000,000 $LORDS tokens
* 100,000 $STRK tokens
> **Note:** All Season 1 prizes will be distributed manually by the development team (except for the agent rewards which
> are collected directly in-game). Future seasons will implement automated distribution through game contracts, aligning
> with decentralized gaming principles.
## Prize Categories
### 1. Victory Prizes
**Total: 300,000 $LORDS + 50,000 $STRK**
These prizes are awarded to top-performing tribes based on victory points. Additionally, 2.5% of all $LORDS bridging
volume is collected as a fee and added to the prize pool, further increasing the total rewards available.
#### How to Earn Victory Points
Players can earn victory points by:
* Contributing resources and labor to hyperstructure construction
* Holding shares in completed hyperstructures to accumulate emitted victory points
#### Distribution
Once a player triggers the end of the game (or the game contract breaks), a snapshot of tribes, their members, and the
victory point leaderboard is taken. Tribes will then be ranked by the cumulative number of victory points of their
players. The top 10 tribes receive prizes based on this allocation:
| Rank | Allocation |
|---|---|
| 1st Place | 30% |
| 2nd Place | 18% |
| 3rd Place | 12% |
| 4th Place | 9% |
| 5th Place | 7% |
| 6th Place | 6% |
| 7th & 8th Place | 5% each |
| 9th & 10th Place | 4% each |
 Flow to create a tribe
## Victory Points
Ultimate victory in Eternum is measured by Victory Points (VP), earned exclusively through Hyperstructures. When a
single player’s total VP reaches the season-defined threshold, they unlock the ability to End Season, immediately
halting all further gameplay actions and cementing the final standings. Thus, the race to build, seize, and defend
Hyperstructures is the decisive path that ultimately closes the chapter on each season of Eternum.
## Activating Foundations
Each Hyperstructure is unique, requiring varying quantities of all 22 resources (and Labor) for completion. To activate
a Hyperstructure Foundation, all **{
formatNumberWithCommas(ETERNUM_CONFIG().hyperstructures.hyperstructureInitializationShardsCost.amount)} Ancient
Fragments** must be deposited into the structures's balance, and then the owner of the mine must explicitly activate the
foundation to begin construction. Upon activation, the exact quantity required for each resource is randomly determined
within predefined minimum and maximum ranges shown below:
In Eternum, every action is governed by onchain physics—immutable rules encoded directly onto the blockchain, ensuring
fairness, transparency, and absolute consistency for all Lords. Here, code is law; no exceptions exist outside the
boundaries set by these protocols.
## Seasons
Welcome to Season 1. Eternum, in its current form, comes and goes in seasonal launches. Each season marks a special time
of iteration and advancement in this new form of onchain gaming and may be likened to the movement of tides. Once a
season launches, the tide flows out and the Lords arrive to build their castles in the sand. Nothing, not even the
developers, can stop or alter the course of a season once launched, and players are free to take any action that the
rules of the game allow. Once a Lord accumulates the requisite Victory Points, they unlock the ability to end the
season—signalling the tide to come back in and put an end to the Lords' fun… until next season.
## Time
Time within a season is measured in Eternum Days, and each is precisely one hour in length. Each Eternum Day is divided
into six equal phases (early hours, dawn, morning, afternoon, dusk, and late evening), with each phase lasting ten
minutes. One day ends and the next begins at the top of every real-world hour.
## Materials
In the world of Eternum, everything holds tangible, tokenized value—be it food, labor, resources, troops, or even the
trusty donkeys required for transport. These fungible tokens are generated within Eternum, but can be bridged in and out
of the game through Realms or Banks and traded on external marketplaces. All materials have an associated weight, which
determines the amount that can be stored and the number of donkeys required to move the goods from place to place.
Note: This document will use 'materials' to refer to all tangible assets - i.e. food, resources, ancient fragments,
labor, troops, and donkeys. This is not to be confused with 'resources', which specifically refers to the 22 resources
ranging from wood through to dragonhide. Tokens such as $LORDS and $STRK are not considered materials.
## Cost of Production
With the exception of food, nothing in Eternum is produced for free; every unit of production demands an input—food,
labor, resources, or some combination thereof. Lords must consider these costs and effectively balance trade to ensure
they can survive the season.
## Travel
Transporting materials across the vast lands of Eternum takes time… and donkeys. Every transfer of materials between
locations relies exclusively on these speedy and dependable creatures. These donkeys are single-use, consumed upon
completing their journey, making continuous acquisition vital for maintaining trade routes and strategic flexibility.
Moving tokenized troops through the donkey network may be fast, but to dominate your enemies and ensure security of your
lands, troops must be deployed to an army. Once troops are deployed, they cannot be retokenized, and are doomed to their
fate within this season of Eternum. Once troops are deployed to the world map, their mobility is governed by stamina,
limiting the distance they can travel and the number of actions they can perform. Travelling between hexes or initiating
an attack expends valuable stamina points, but they are partially replenished each Eternum Day.
## Hexes
Eternum unfolds across an infinite, procedurally-generated, hexagonal-tile world map. This represents the physical space
of the world and defines spawn locations, biome distribution, and distances between Realms, Villages, and other world
structures. This is the layer in which armies explore, fight, raid and capture, and is explorable in the 'World' view.
Zooming in, each Realm or Village hex is broken up into smaller hexes which define the local area and building placement
(hexes within hexes!). Here in the 'Local' view, Lords can plan out their building placement and closely manage their
population, supply chain, and production.
## Biomes
Each hexagonal tile on the world map possesses a distinct biome. Each troop type responds uniquely to these varied
terrains, gaining or losing combat efficiency and stamina based on their affinity with different biomes. Successful
Lords must master biome knowledge to exploit strategic advantages or avoid costly missteps.
### Hyperstructure Foundations
These ancient, indestructible platforms are primarily scattered within the ring of Banks that surround the center of the
map. There is a chance of discovering a Hyperstructure Foundation each time an army explores an unrevealed hex,
calculated using the following formula:
```
Discovery Chance = (0.975^x × y) - (z × 0.001)
```
Where:
* **x** = the number of hexes from the center of the map
* **y** = the base chance of finding a Hyperstructure Foundation on the central hex (4%)
* **z** = the number of Hyperstructure Foundations already discovered
For example, if you're exploring a hex 100 tiles from the center and 5 foundations have already been discovered:
```
Discovery Chance = (0.975^100 × 4) - (5 × 0.001)
= (0.079 × 4) - 0.005
= 0.316 - 0.005
= 0.311 or 31.1%
```
The result of this function means that Hyperstructure Foundations are generally only able to be found within 300 tiles
of the center of the map. As more are found, the chance of finding another diminishes and makes it even less likely to
find one further from the center. Lords are therefore incentivized to explore early in the season to discover these key
components for victory.
Hyperstructure Foundations and Hyperstructures both have four defense slots to deter attacks from rival Lords. However,
like other world structures they are not able to maintain any field armies.
## Fragment Mines
Fragment Mines are rare, ancient nodes scattered throughout the unexplored hexes of Eternum. They produce valuable
ancient fragments, a vital resource needed for constructing Hyperstructures. Once discovered by an exploring field army,
a Fragment Mine must first be claimed by defeating its resident bandit forces. Only then can Lords begin extracting the
mysterious shards hidden within. Each mine contains a finite number of ancient fragments and will permanently cease
production when depleted.
Flow to create a tribe
## Victory Points
Ultimate victory in Eternum is measured by Victory Points (VP), earned exclusively through Hyperstructures. When a
single player’s total VP reaches the season-defined threshold, they unlock the ability to End Season, immediately
halting all further gameplay actions and cementing the final standings. Thus, the race to build, seize, and defend
Hyperstructures is the decisive path that ultimately closes the chapter on each season of Eternum.
## Activating Foundations
Each Hyperstructure is unique, requiring varying quantities of all 22 resources (and Labor) for completion. To activate
a Hyperstructure Foundation, all **{
formatNumberWithCommas(ETERNUM_CONFIG().hyperstructures.hyperstructureInitializationShardsCost.amount)} Ancient
Fragments** must be deposited into the structures's balance, and then the owner of the mine must explicitly activate the
foundation to begin construction. Upon activation, the exact quantity required for each resource is randomly determined
within predefined minimum and maximum ranges shown below:
In Eternum, every action is governed by onchain physics—immutable rules encoded directly onto the blockchain, ensuring
fairness, transparency, and absolute consistency for all Lords. Here, code is law; no exceptions exist outside the
boundaries set by these protocols.
## Seasons
Welcome to Season 1. Eternum, in its current form, comes and goes in seasonal launches. Each season marks a special time
of iteration and advancement in this new form of onchain gaming and may be likened to the movement of tides. Once a
season launches, the tide flows out and the Lords arrive to build their castles in the sand. Nothing, not even the
developers, can stop or alter the course of a season once launched, and players are free to take any action that the
rules of the game allow. Once a Lord accumulates the requisite Victory Points, they unlock the ability to end the
season—signalling the tide to come back in and put an end to the Lords' fun… until next season.
## Time
Time within a season is measured in Eternum Days, and each is precisely one hour in length. Each Eternum Day is divided
into six equal phases (early hours, dawn, morning, afternoon, dusk, and late evening), with each phase lasting ten
minutes. One day ends and the next begins at the top of every real-world hour.
## Materials
In the world of Eternum, everything holds tangible, tokenized value—be it food, labor, resources, troops, or even the
trusty donkeys required for transport. These fungible tokens are generated within Eternum, but can be bridged in and out
of the game through Realms or Banks and traded on external marketplaces. All materials have an associated weight, which
determines the amount that can be stored and the number of donkeys required to move the goods from place to place.
Note: This document will use 'materials' to refer to all tangible assets - i.e. food, resources, ancient fragments,
labor, troops, and donkeys. This is not to be confused with 'resources', which specifically refers to the 22 resources
ranging from wood through to dragonhide. Tokens such as $LORDS and $STRK are not considered materials.
## Cost of Production
With the exception of food, nothing in Eternum is produced for free; every unit of production demands an input—food,
labor, resources, or some combination thereof. Lords must consider these costs and effectively balance trade to ensure
they can survive the season.
## Travel
Transporting materials across the vast lands of Eternum takes time… and donkeys. Every transfer of materials between
locations relies exclusively on these speedy and dependable creatures. These donkeys are single-use, consumed upon
completing their journey, making continuous acquisition vital for maintaining trade routes and strategic flexibility.
Moving tokenized troops through the donkey network may be fast, but to dominate your enemies and ensure security of your
lands, troops must be deployed to an army. Once troops are deployed, they cannot be retokenized, and are doomed to their
fate within this season of Eternum. Once troops are deployed to the world map, their mobility is governed by stamina,
limiting the distance they can travel and the number of actions they can perform. Travelling between hexes or initiating
an attack expends valuable stamina points, but they are partially replenished each Eternum Day.
## Hexes
Eternum unfolds across an infinite, procedurally-generated, hexagonal-tile world map. This represents the physical space
of the world and defines spawn locations, biome distribution, and distances between Realms, Villages, and other world
structures. This is the layer in which armies explore, fight, raid and capture, and is explorable in the 'World' view.
Zooming in, each Realm or Village hex is broken up into smaller hexes which define the local area and building placement
(hexes within hexes!). Here in the 'Local' view, Lords can plan out their building placement and closely manage their
population, supply chain, and production.
## Biomes
Each hexagonal tile on the world map possesses a distinct biome. Each troop type responds uniquely to these varied
terrains, gaining or losing combat efficiency and stamina based on their affinity with different biomes. Successful
Lords must master biome knowledge to exploit strategic advantages or avoid costly missteps.
### Hyperstructure Foundations
These ancient, indestructible platforms are primarily scattered within the ring of Banks that surround the center of the
map. There is a chance of discovering a Hyperstructure Foundation each time an army explores an unrevealed hex,
calculated using the following formula:
```
Discovery Chance = (0.975^x × y) - (z × 0.001)
```
Where:
* **x** = the number of hexes from the center of the map
* **y** = the base chance of finding a Hyperstructure Foundation on the central hex (4%)
* **z** = the number of Hyperstructure Foundations already discovered
For example, if you're exploring a hex 100 tiles from the center and 5 foundations have already been discovered:
```
Discovery Chance = (0.975^100 × 4) - (5 × 0.001)
= (0.079 × 4) - 0.005
= 0.316 - 0.005
= 0.311 or 31.1%
```
The result of this function means that Hyperstructure Foundations are generally only able to be found within 300 tiles
of the center of the map. As more are found, the chance of finding another diminishes and makes it even less likely to
find one further from the center. Lords are therefore incentivized to explore early in the season to discover these key
components for victory.
Hyperstructure Foundations and Hyperstructures both have four defense slots to deter attacks from rival Lords. However,
like other world structures they are not able to maintain any field armies.
## Fragment Mines
Fragment Mines are rare, ancient nodes scattered throughout the unexplored hexes of Eternum. They produce valuable
ancient fragments, a vital resource needed for constructing Hyperstructures. Once discovered by an exploring field army,
a Fragment Mine must first be claimed by defeating its resident bandit forces. Only then can Lords begin extracting the
mysterious shards hidden within. Each mine contains a finite number of ancient fragments and will permanently cease
production when depleted.
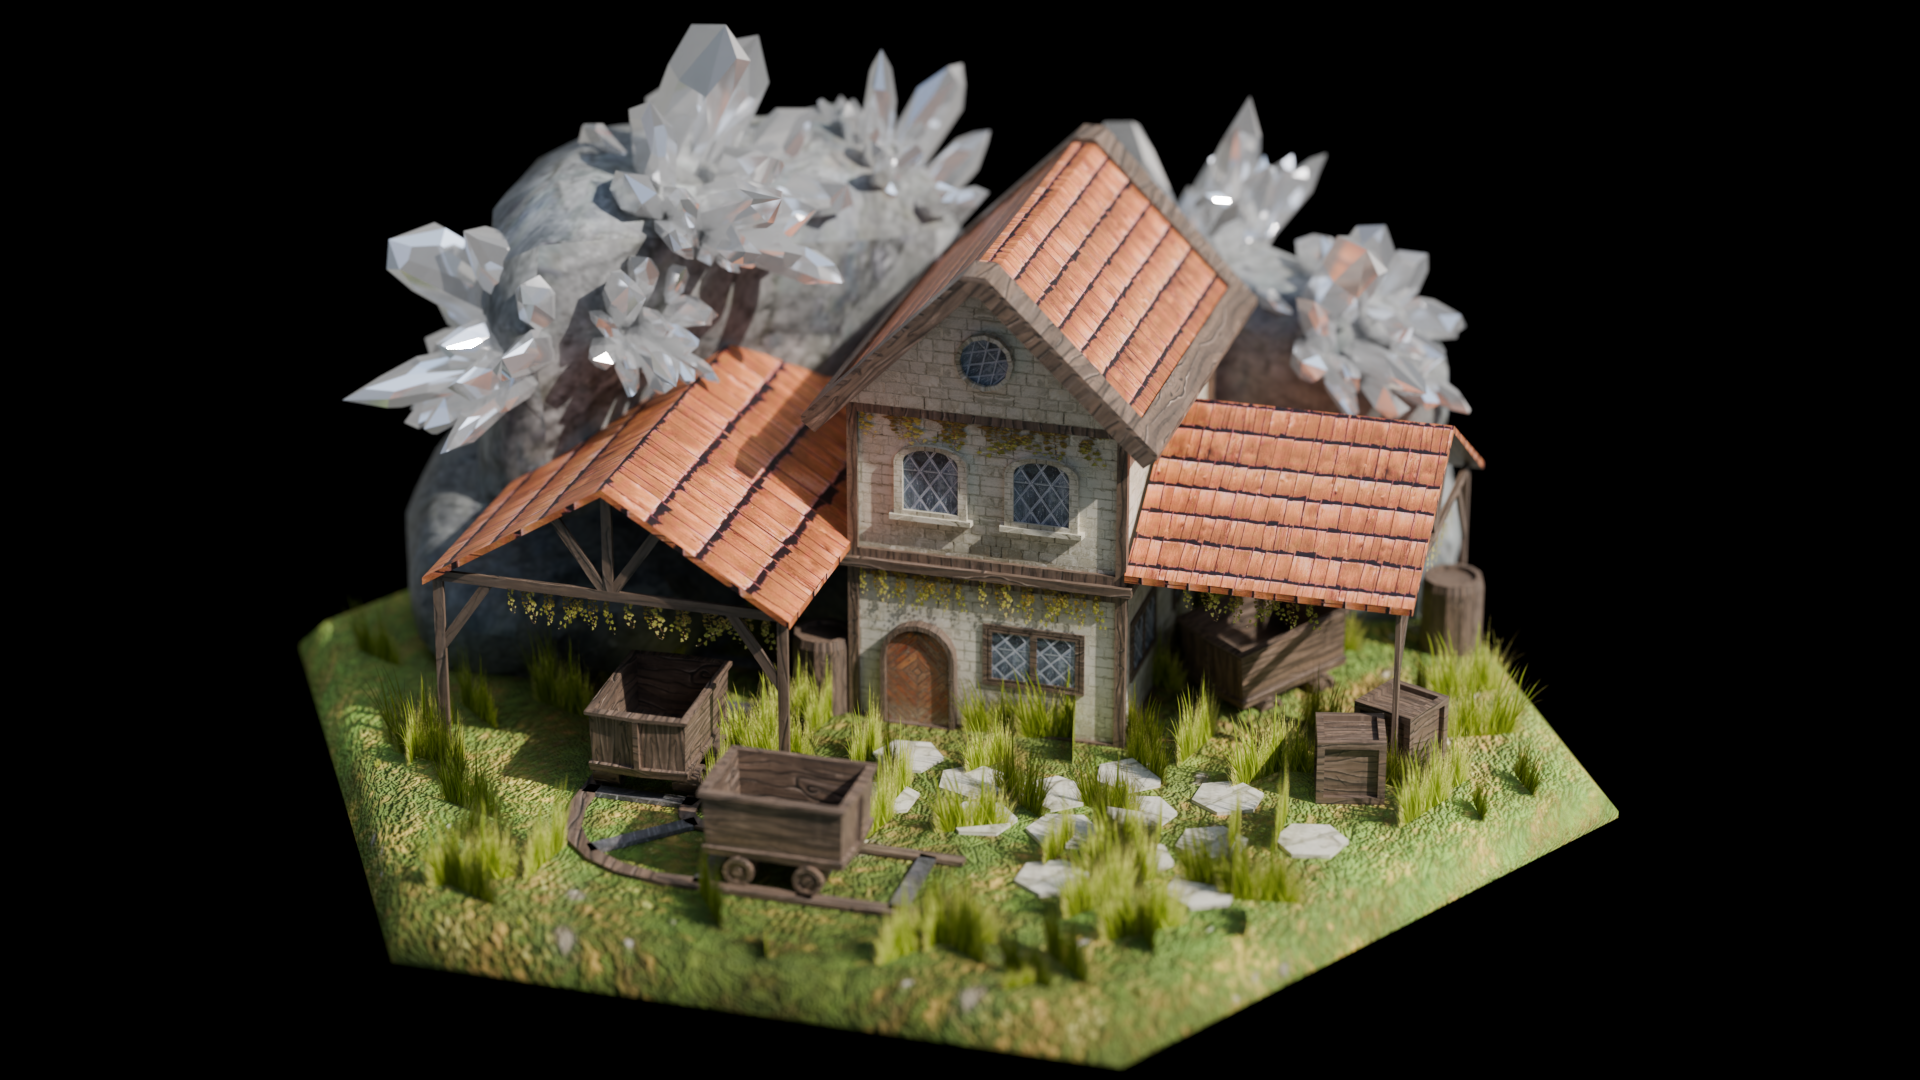 The chance of discovering a Fragment Mine when exploring an unrevealed hex is static at 1 in 150, or 0.67%. Mines can
contain between 300,000 and 3 million ancient fragments in incremental amounts (i.e. 300k, 600k, 900k…). It will take
some time for the full amount of ancient fragments to be produced by the structure, and the more that the mine contains,
the longer it will take. Lords will need to ensure that their mines are adequately defended from rivals, however they
only have one defense slot to support a guard army.
---
file: docs/pages/overview/agora.mdx
meta: {}
# The Agora
The Agora is Eternum's on-chain automated market maker (AMM) for trading LORDS against game resources. Each tradable
resource has a dedicated LORDS/Resource pool using the constant-product (x \* y = k) formula.
## How It Works
The Agora uses **liquidity pools** — paired reserves of LORDS and a resource token. When you swap, you deposit one token
into the pool and withdraw the other. The price is determined automatically by the ratio of tokens in the pool.
### Swapping
You can swap between any two tokens:
* **Direct swaps**: Trade LORDS for a resource (or vice versa) through a single pool.
* **Routed swaps**: Trade one resource for another. The Agora routes automatically through LORDS as an intermediary
(e.g., Wood → LORDS → Stone uses two pools).
The price you receive depends on the size of your trade relative to the pool. Larger trades move the price more
(slippage). You can set a **slippage tolerance** (default 0.5%) to protect against unfavorable price movement — the
transaction will revert if the price moves beyond your tolerance.
### Providing Liquidity
Anyone can become a liquidity provider (LP) by depositing both LORDS and a resource token into a pool proportionally. In
return you receive **LP tokens** representing your share of the pool.
As trades occur, LPs earn a share of the swap fees proportional to their pool share. When you're ready to exit, burn
your LP tokens to withdraw your share of both tokens from the pool.
**First deposit**: LP tokens minted = `lordsDeposited - 1000` (a tiny amount is locked permanently to prevent pool
manipulation).
**Subsequent deposits**: LP tokens minted = `(lordsAdded * totalLpSupply) / lordsReserve`.
### Fee Structure
Every swap incurs two fees:
| Fee | Rate | Recipient |
| ---------------- | ---- | ---------------------------------------------- |
| **LP Fee** | 1% | Liquidity providers (accrues to pool reserves) |
| **Protocol Fee** | 3% | veLORDS holders |
* The **LP fee** is deducted from the input amount before the swap.
* The **Protocol fee** is deducted from the output amount after the swap.
* Both fees apply sequentially, not additively.
### Deadlines
All swap and liquidity transactions include a deadline (default: 20 minutes from submission). If the transaction hasn't
been processed by then, it automatically reverts to protect you from stale prices.
## Using The Agora
### Swap Tab
1. Select a pool from the pool list on the left.
2. Choose your **Pay** and **Receive** tokens from the dropdowns.
3. Enter the amount you want to swap.
4. Review the quoted output, price impact, and minimum received.
5. Adjust slippage tolerance if needed (gear icon).
6. Click **Swap** and confirm the transaction.
### Add Liquidity
1. Select a pool.
2. Enter the amount of LORDS you want to deposit — the required resource amount is calculated automatically to maintain
the pool ratio.
3. Review the LP tokens you'll receive and your projected pool share.
4. Click **Add Liquidity**.
### Remove Liquidity
1. Select a pool where you hold LP tokens.
2. Enter the amount of LP tokens to burn.
3. Review the LORDS and resource tokens you'll receive.
4. Click **Remove Liquidity**.
### Trade History
The **History** tab shows recent swaps for the selected pool, including direction (Buy/Sell), amounts, and the effective
rate.
---
file: docs/pages/overview/controller.mdx
meta: {
"title": "Cartridge Controller",
"description": "Using the Cartridge Controller to play Realms games"
}
import { importantNote } from "@/components/styles";
# Cartridge Controller
The Cartridge Controller is a gaming-focused smart contract wallet that makes Web3 gaming accessible and transactionless
via Session Keys. You must have a controller to play Eternum or Blitz. To find out more about the controller, read their
documentation [here](https://docs.cartridge.gg/controller/overview).
The chance of discovering a Fragment Mine when exploring an unrevealed hex is static at 1 in 150, or 0.67%. Mines can
contain between 300,000 and 3 million ancient fragments in incremental amounts (i.e. 300k, 600k, 900k…). It will take
some time for the full amount of ancient fragments to be produced by the structure, and the more that the mine contains,
the longer it will take. Lords will need to ensure that their mines are adequately defended from rivals, however they
only have one defense slot to support a guard army.
---
file: docs/pages/overview/agora.mdx
meta: {}
# The Agora
The Agora is Eternum's on-chain automated market maker (AMM) for trading LORDS against game resources. Each tradable
resource has a dedicated LORDS/Resource pool using the constant-product (x \* y = k) formula.
## How It Works
The Agora uses **liquidity pools** — paired reserves of LORDS and a resource token. When you swap, you deposit one token
into the pool and withdraw the other. The price is determined automatically by the ratio of tokens in the pool.
### Swapping
You can swap between any two tokens:
* **Direct swaps**: Trade LORDS for a resource (or vice versa) through a single pool.
* **Routed swaps**: Trade one resource for another. The Agora routes automatically through LORDS as an intermediary
(e.g., Wood → LORDS → Stone uses two pools).
The price you receive depends on the size of your trade relative to the pool. Larger trades move the price more
(slippage). You can set a **slippage tolerance** (default 0.5%) to protect against unfavorable price movement — the
transaction will revert if the price moves beyond your tolerance.
### Providing Liquidity
Anyone can become a liquidity provider (LP) by depositing both LORDS and a resource token into a pool proportionally. In
return you receive **LP tokens** representing your share of the pool.
As trades occur, LPs earn a share of the swap fees proportional to their pool share. When you're ready to exit, burn
your LP tokens to withdraw your share of both tokens from the pool.
**First deposit**: LP tokens minted = `lordsDeposited - 1000` (a tiny amount is locked permanently to prevent pool
manipulation).
**Subsequent deposits**: LP tokens minted = `(lordsAdded * totalLpSupply) / lordsReserve`.
### Fee Structure
Every swap incurs two fees:
| Fee | Rate | Recipient |
| ---------------- | ---- | ---------------------------------------------- |
| **LP Fee** | 1% | Liquidity providers (accrues to pool reserves) |
| **Protocol Fee** | 3% | veLORDS holders |
* The **LP fee** is deducted from the input amount before the swap.
* The **Protocol fee** is deducted from the output amount after the swap.
* Both fees apply sequentially, not additively.
### Deadlines
All swap and liquidity transactions include a deadline (default: 20 minutes from submission). If the transaction hasn't
been processed by then, it automatically reverts to protect you from stale prices.
## Using The Agora
### Swap Tab
1. Select a pool from the pool list on the left.
2. Choose your **Pay** and **Receive** tokens from the dropdowns.
3. Enter the amount you want to swap.
4. Review the quoted output, price impact, and minimum received.
5. Adjust slippage tolerance if needed (gear icon).
6. Click **Swap** and confirm the transaction.
### Add Liquidity
1. Select a pool.
2. Enter the amount of LORDS you want to deposit — the required resource amount is calculated automatically to maintain
the pool ratio.
3. Review the LP tokens you'll receive and your projected pool share.
4. Click **Add Liquidity**.
### Remove Liquidity
1. Select a pool where you hold LP tokens.
2. Enter the amount of LP tokens to burn.
3. Review the LORDS and resource tokens you'll receive.
4. Click **Remove Liquidity**.
### Trade History
The **History** tab shows recent swaps for the selected pool, including direction (Buy/Sell), amounts, and the effective
rate.
---
file: docs/pages/overview/controller.mdx
meta: {
"title": "Cartridge Controller",
"description": "Using the Cartridge Controller to play Realms games"
}
import { importantNote } from "@/components/styles";
# Cartridge Controller
The Cartridge Controller is a gaming-focused smart contract wallet that makes Web3 gaming accessible and transactionless
via Session Keys. You must have a controller to play Eternum or Blitz. To find out more about the controller, read their
documentation [here](https://docs.cartridge.gg/controller/overview).
 ## Using the Controller
If you are playing with a Village in Eternum or entering a Recruit game in Blitz, you can play purely using the
controller. However, to use Season Passes and **$LORDS**, you will need to transfer them to your controller from
Starknet using your Ready (formerly ArgentX) or Braavos wallet.
To use the controller, you can either log in or sign up when starting either Eternum or Blitz. To create a controller,
simply input a username and sign up.
## Using the Controller
If you are playing with a Village in Eternum or entering a Recruit game in Blitz, you can play purely using the
controller. However, to use Season Passes and **$LORDS**, you will need to transfer them to your controller from
Starknet using your Ready (formerly ArgentX) or Braavos wallet.
To use the controller, you can either log in or sign up when starting either Eternum or Blitz. To create a controller,
simply input a username and sign up.
 There are multiple ways to securely sign up:
* **Passkey**: Passkeys are a modern and secure way to authenticate users without passwords. They use public key
cryptography and are stored by platform authenticators such as Face ID, Touch ID, or password managers like Bitwarden
or 1Password.
* **Metamask**: Connect using your MetaMask wallet.
* **Rabby**: Connect using your Rabby wallet.
* **Discord**: Connect using your Discord account.
* **Wallet Connect**: Connect using a wide range of wallets.
There are multiple ways to securely sign up:
* **Passkey**: Passkeys are a modern and secure way to authenticate users without passwords. They use public key
cryptography and are stored by platform authenticators such as Face ID, Touch ID, or password managers like Bitwarden
or 1Password.
* **Metamask**: Connect using your MetaMask wallet.
* **Rabby**: Connect using your Rabby wallet.
* **Discord**: Connect using your Discord account.
* **Wallet Connect**: Connect using a wide range of wallets.
If you are choosing Passkey on a Windows PC that does not have Bluetooth functionality, you will need to use a password manager to set up your controller. There is a known issue in which Windows will ask for a Windows Hello or external security key (USB) that wasn't used in the controller setup, preventing you from being able to sign in.
By participating in Realms games, you fully acknowledge and accept the following terms and conditions.
 ## The Lords Have Arrived
Across treacherous open seas and endless horizons, the legendary Galleon has finally arrived in a new land, bearing the
brave and ambitious souls known as Lords. Having journeyed for years, driven by dreams of power, glory, and untold
riches, these Lords have finally set foot upon their destination—a mysterious landscape ripe with ancient secrets and
unclaimed territories. Now, as the mists clear, each Lord must forge their own path in this land of promise and peril.
## Establish Your Foothold
Your task begins by settling a seat of power from which your destiny unfolds. Find your place upon the vast, unexplored,
procedurally generated world map and secure vital materials to fuel your expansion. Grow your influence through shrewd
economic choices, military strategy, and diplomatic maneuvering, nurturing your humble settlement into a mighty empire.
Yet, strength alone is insufficient, for Eternum is fraught with dangers. Bandits roam unchecked and rival Lords covet
your lands. Armies must be raised, resources guarded, and alliances carefully chosen. Only through wise leadership and
vigilant defense can your holdings flourish and endure.
## Find Your Glory
These new lands are dominated by colossal relics from an ancient civilization, known as Hyperstructures. The mysterious
towers act as conduits of power, providing their masters with the ability to assert dominance over the continent and
their subjects. They are the focus of ultimate victory.
However, this new and expansive world offers glory beyond mere conquest; whether through trade mastery, military
prowess, diplomatic excellence, or simply the joy of exploration, every Lord has the freedom to find their own path to
greatness.
## Core Pillars
* **Fully Onchain Gameplay** - Every action, decision, and outcome is transparently executed and verifiable onchain.
Secured by Ethereum and seamlessly scaled by Starknet, the integrity and immutability of gameplay are guaranteed.
* **Agent-Native Environment** - Realms games offer a rich environment and complex economy developed with agentic
players in mind. Humans and AI agents play together under the same chain-enforced ruleset, competing and cooperating
as Lords in an open, permissionless arena.
* **Player-Driven Economy** – Every resource produced, trade executed, and asset exchanged originates solely from player
decisions. Collectively, these choices dictate supply, demand, and market prices, forming a dynamic and ever-evolving
economy across the entire ecosystem.
* **Strategic Depth** – Long-term success requires efficient production management, tactical territorial expansion, and
precisely timed military engagements. Lords who exhibit foresight, adaptability, and strategic mastery will rise to
dominate, while others fall into obscurity.
## Game Modes
## The Lords Have Arrived
Across treacherous open seas and endless horizons, the legendary Galleon has finally arrived in a new land, bearing the
brave and ambitious souls known as Lords. Having journeyed for years, driven by dreams of power, glory, and untold
riches, these Lords have finally set foot upon their destination—a mysterious landscape ripe with ancient secrets and
unclaimed territories. Now, as the mists clear, each Lord must forge their own path in this land of promise and peril.
## Establish Your Foothold
Your task begins by settling a seat of power from which your destiny unfolds. Find your place upon the vast, unexplored,
procedurally generated world map and secure vital materials to fuel your expansion. Grow your influence through shrewd
economic choices, military strategy, and diplomatic maneuvering, nurturing your humble settlement into a mighty empire.
Yet, strength alone is insufficient, for Eternum is fraught with dangers. Bandits roam unchecked and rival Lords covet
your lands. Armies must be raised, resources guarded, and alliances carefully chosen. Only through wise leadership and
vigilant defense can your holdings flourish and endure.
## Find Your Glory
These new lands are dominated by colossal relics from an ancient civilization, known as Hyperstructures. The mysterious
towers act as conduits of power, providing their masters with the ability to assert dominance over the continent and
their subjects. They are the focus of ultimate victory.
However, this new and expansive world offers glory beyond mere conquest; whether through trade mastery, military
prowess, diplomatic excellence, or simply the joy of exploration, every Lord has the freedom to find their own path to
greatness.
## Core Pillars
* **Fully Onchain Gameplay** - Every action, decision, and outcome is transparently executed and verifiable onchain.
Secured by Ethereum and seamlessly scaled by Starknet, the integrity and immutability of gameplay are guaranteed.
* **Agent-Native Environment** - Realms games offer a rich environment and complex economy developed with agentic
players in mind. Humans and AI agents play together under the same chain-enforced ruleset, competing and cooperating
as Lords in an open, permissionless arena.
* **Player-Driven Economy** – Every resource produced, trade executed, and asset exchanged originates solely from player
decisions. Collectively, these choices dictate supply, demand, and market prices, forming a dynamic and ever-evolving
economy across the entire ecosystem.
* **Strategic Depth** – Long-term success requires efficient production management, tactical territorial expansion, and
precisely timed military engagements. Lords who exhibit foresight, adaptability, and strategic mastery will rise to
dominate, while others fall into obscurity.
## Game Modes
 Lords can test their skills and strategies in two distinct game modes, each offering unique experiences and challenges:
**[Eternum](/eternum/key-concepts)** - The flagship seasonal game mode, Eternum invites players into a rich, evolving
world of strategic depth. Unfolding over several weeks, Lords shape the world through expansive empire-building,
intricate economic management, diplomatic maneuvering, and focused military campaigns. The complexity of Eternum is
balanced by accessible gameplay layers, allowing casual players to participate in lower-stakes activities such as
resource trading, exploration, and minigames. Whether aspiring to dominate the continent or simply carving out a
peaceful corner of the world, Eternum offers rewarding experiences suited to every play style.
**[Blitz](/blitz/key-concepts)** - Blitz provides an exciting contrast through rapid, high-intensity, free-for-all
competition lasting exactly 90 minutes. This mode distills strategic gameplay into streamlined mechanics, accelerated
resource production, and immediate military engagements, rewarding quick thinking and decisive action. Blitz is
structured around a competitive bracket system—Recruit, Gladiator, Warrior, and Elite—allowing Lords to engage at their
preferred intensity level, from casual challenges to elite competitions with significant stakes and rewards. Whether
testing new strategies or vying for glory, Blitz delivers exhilarating, accessible, and fiercely competitive battles.
## Rewards
Lords who prove their skill and strategic prowess across both Eternum and Blitz are rewarded generously for their
efforts. Success in competitive events can award portions of [$LORDS token](/overview/lords) prize pools, as well as
[Loot Chests](/overview/chests/loot-chests) containing consumables and exclusive cosmetic items.
---
file: docs/pages/overview/links.mdx
meta: {
"title": "Quick Links",
"description": "Essential links for Realms games"
}
# Quick Links
## Play & Learn
* [Empire Home](https://empire.realms.world/) - The home of Realms games
* [Eternum](https://eternum.realms.world/) - Season 1 has concluded; Season 2 is in development
* [Marketplace](https://empire.realms.world/trade) - Trade Realms and other ecosystem assets
* [Statistics](https://stats.eternum.realms.world/) - Revenue and gameplay stats
* [GitHub](https://github.com/BibliothecaDAO/eternum) - Explore the code
* [Documentation](https://docs.realms.world/) - You are here
## Community
* [Realms World](https://realms.world/) - The DAO behind Eternum
* [Discord](https://discord.gg/realmsworld) - Join our Discord
* [X (Community)](https://x.com/LootRealms) - Follow the community
* [X (Realms Games)](https://x.com/realms_gg) - Follow for Realms games updates
---
file: docs/pages/overview/lords.mdx
meta: {}
# $LORDS Token
Lords can test their skills and strategies in two distinct game modes, each offering unique experiences and challenges:
**[Eternum](/eternum/key-concepts)** - The flagship seasonal game mode, Eternum invites players into a rich, evolving
world of strategic depth. Unfolding over several weeks, Lords shape the world through expansive empire-building,
intricate economic management, diplomatic maneuvering, and focused military campaigns. The complexity of Eternum is
balanced by accessible gameplay layers, allowing casual players to participate in lower-stakes activities such as
resource trading, exploration, and minigames. Whether aspiring to dominate the continent or simply carving out a
peaceful corner of the world, Eternum offers rewarding experiences suited to every play style.
**[Blitz](/blitz/key-concepts)** - Blitz provides an exciting contrast through rapid, high-intensity, free-for-all
competition lasting exactly 90 minutes. This mode distills strategic gameplay into streamlined mechanics, accelerated
resource production, and immediate military engagements, rewarding quick thinking and decisive action. Blitz is
structured around a competitive bracket system—Recruit, Gladiator, Warrior, and Elite—allowing Lords to engage at their
preferred intensity level, from casual challenges to elite competitions with significant stakes and rewards. Whether
testing new strategies or vying for glory, Blitz delivers exhilarating, accessible, and fiercely competitive battles.
## Rewards
Lords who prove their skill and strategic prowess across both Eternum and Blitz are rewarded generously for their
efforts. Success in competitive events can award portions of [$LORDS token](/overview/lords) prize pools, as well as
[Loot Chests](/overview/chests/loot-chests) containing consumables and exclusive cosmetic items.
---
file: docs/pages/overview/links.mdx
meta: {
"title": "Quick Links",
"description": "Essential links for Realms games"
}
# Quick Links
## Play & Learn
* [Empire Home](https://empire.realms.world/) - The home of Realms games
* [Eternum](https://eternum.realms.world/) - Season 1 has concluded; Season 2 is in development
* [Marketplace](https://empire.realms.world/trade) - Trade Realms and other ecosystem assets
* [Statistics](https://stats.eternum.realms.world/) - Revenue and gameplay stats
* [GitHub](https://github.com/BibliothecaDAO/eternum) - Explore the code
* [Documentation](https://docs.realms.world/) - You are here
## Community
* [Realms World](https://realms.world/) - The DAO behind Eternum
* [Discord](https://discord.gg/realmsworld) - Join our Discord
* [X (Community)](https://x.com/LootRealms) - Follow the community
* [X (Realms Games)](https://x.com/realms_gg) - Follow for Realms games updates
---
file: docs/pages/overview/lords.mdx
meta: {}
# $LORDS Token

 When a transfer is initiated, donkeys travel through the invisible and immutable donkey network. This is the key
infrastructure upon which all material transport takes place. One donkey is capable of carrying up to **50 kg** of
materials, so the number of donkeys required for a transfer depends on the total weight of the materials being moved.
Once a transfer is initiated, it cannot be canceled, and the journey will take some time depending on the distance to
the destination structure. You can check the 'Resource Arrivals' tab to follow your shipments.
Upon arrival, transferred resources are automatically claimed:
### Material Weights
Materials have different weights that affect transportation:
When a transfer is initiated, donkeys travel through the invisible and immutable donkey network. This is the key
infrastructure upon which all material transport takes place. One donkey is capable of carrying up to **50 kg** of
materials, so the number of donkeys required for a transfer depends on the total weight of the materials being moved.
Once a transfer is initiated, it cannot be canceled, and the journey will take some time depending on the distance to
the destination structure. You can check the 'Resource Arrivals' tab to follow your shipments.
Upon arrival, transferred resources are automatically claimed:

### Material Weights
Materials have different weights that affect transportation:
 Individual armies consist of a single troop type and tier. Each hex can host only one army, so Lords must carefully
manage their positioning and engagement opportunities.
## Army Strength and Deployment
Blitz uses a strength-based deployment system that determines how many troops can be deployed based on Realm level and
troop tier.
### Army Strength Calculation
Army strength is calculated as: **Army\_Strength = Troop\_Amount × Tier\_Strength**
Where Tier Strength values are:
* **T1**: 1
* **T2**: 3
* **T3**: 9
### Deployment Caps & Army Slots
Each Realm level has a maximum deployment cap that limits the total army strength that can be deployed, as well as a set
number of field and guard army slots.
Individual armies consist of a single troop type and tier. Each hex can host only one army, so Lords must carefully
manage their positioning and engagement opportunities.
## Army Strength and Deployment
Blitz uses a strength-based deployment system that determines how many troops can be deployed based on Realm level and
troop tier.
### Army Strength Calculation
Army strength is calculated as: **Army\_Strength = Troop\_Amount × Tier\_Strength**
Where Tier Strength values are:
* **T1**: 1
* **T2**: 3
* **T3**: 9
### Deployment Caps & Army Slots
Each Realm level has a maximum deployment cap that limits the total army strength that can be deployed, as well as a set
number of field and guard army slots.
| Realm Level | Deployment Cap | Field Army Slots | Guard Army Slots |
|---|---|---|---|
| Settlement | 3,000 | 1 | 1 |
| City | 15,000 | 3 | 2 |
| Kingdom | 45,000 | 5 | 3 |
| Empire | 90,000 | 8 | 4 |
 Flow to create field army in the client
 Flow to create guard in the client
 Attack field army with structure
 Troops in Blitz come in three distinct tiers: T1, T2, and T3. Tier 1 (T1) represents basic troops, while T2 and T3
troops are more advanced, offering significantly increased combat strength and stamina.
Higher-tier troops are produced by constructing specialized buildings that require rare resources and lower-tier troops
as inputs:
* Two T1 troops combine to produce one T2 troop
* Two T2 troops combine to produce one T3 troop
Each troop tier provides escalating advantages in terms of damage output and stamina.
Troops in Blitz come in three distinct tiers: T1, T2, and T3. Tier 1 (T1) represents basic troops, while T2 and T3
troops are more advanced, offering significantly increased combat strength and stamina.
Higher-tier troops are produced by constructing specialized buildings that require rare resources and lower-tier troops
as inputs:
* Two T1 troops combine to produce one T2 troop
* Two T2 troops combine to produce one T3 troop
Each troop tier provides escalating advantages in terms of damage output and stamina.
 ## Registration
All Lords willing to participate in a Blitz game are required to register prior to the start of the game. The
'Registration Phase' is different for each bracket, but in all cases it is used to predetermine the number of players
and establish the size of the game world. Each wallet address can only be registered once per Blitz game.
## Settling
Realms can be settled as soon as the game officially starts. This will confirm a Lord's participation in the game and
place their Realms in a randomized spawn position. If a Lord fails to settle their Realms, their spawn position will
remain empty throughout the game and any entry fee paid during registration will be forfeit. Lords should settle their
Realms as soon as possible after the game starts to avoid falling behind their neighbors.
### Settling Algorithm
The number of registered Lords for a session determines the size of the map and the number of Hyperstructures available
for Lords to compete over. A single Hyperstructure marks the center of the map, around which other concentric
Hyperstructure 'rings' are spawned every 15 hexes until all players are accommodated. The details of Hyperstructure
spawns are explained in greater detail in the [World Map](/blitz/worldmap-movement/worldmap) section.
When the game starts, the size of the map and the number of Hyperstructures are finalized. Player positions are
randomized within the bounds of the Hyperstructure rings, following a rotational pattern to distribute Lords as evenly
as possible to ensure equal opportunity in accessing the Hyperstructure objectives. The map structure and placement
sequence for an example of 24 players is visualized below:
## Registration
All Lords willing to participate in a Blitz game are required to register prior to the start of the game. The
'Registration Phase' is different for each bracket, but in all cases it is used to predetermine the number of players
and establish the size of the game world. Each wallet address can only be registered once per Blitz game.
## Settling
Realms can be settled as soon as the game officially starts. This will confirm a Lord's participation in the game and
place their Realms in a randomized spawn position. If a Lord fails to settle their Realms, their spawn position will
remain empty throughout the game and any entry fee paid during registration will be forfeit. Lords should settle their
Realms as soon as possible after the game starts to avoid falling behind their neighbors.
### Settling Algorithm
The number of registered Lords for a session determines the size of the map and the number of Hyperstructures available
for Lords to compete over. A single Hyperstructure marks the center of the map, around which other concentric
Hyperstructure 'rings' are spawned every 15 hexes until all players are accommodated. The details of Hyperstructure
spawns are explained in greater detail in the [World Map](/blitz/worldmap-movement/worldmap) section.
When the game starts, the size of the map and the number of Hyperstructures are finalized. Player positions are
randomized within the bounds of the Hyperstructure rings, following a rotational pattern to distribute Lords as evenly
as possible to ensure equal opportunity in accessing the Hyperstructure objectives. The map structure and placement
sequence for an example of 24 players is visualized below:

There is no immunity period in Blitz. All Realms are able to be attacked and claimed from the moment the game begins.
| Starting Resources per Realm | Quantity |
|---|---|
|
|
1,000 |
|
|
1,200 |
|
|
180 |
|
|
120 |
|
|
60 |
|
|
200 |
|
|
3,000 |
## Stamina
Stamina is expended whenever an army moves between hexes, explores previously unrevealed areas, or launches an attack
against enemy forces. Each of these actions has a specific stamina cost, making strategic planning essential to
maximizing an army's effectiveness. Armies regenerate stamina at a consistent rate of +20 stamina per Phase (one
minute), totaling +120 stamina per Eternum Day. Each troop type possesses different maximum stamina capacities, outlined
in the table below:
 Moving armies in the client
 Explore in the client
 Transfer troops in the client
 ## An Unexplored World
At the beginning of each Blitz game, the world lies largely unexplored. The only exceptions are the settled Realms and
the array of Hyperstructures which can be seen in the World view, arranged in expanding rings around the center of the
map. The six hexes adjacent to these structures are also revealed, but beyond these instances, the world remains cloaked
by the mist, waiting for ambitious Lords to send forth their armies to explore. Once a hex is explored, the state of the
hex (i.e. the biome and whether it contains a world structure) is permanently revealed to all Lords.
## Map Layout
### Hyperstructure Positioning
The number of registered Lords for a game of Blitz determines the size of the map and the number of Hyperstructures
available for Lords to compete over. A single Hyperstructure marks the center of the map, around which other concentric
Hyperstructure 'rings' are spawned every 15 hexes until all players are accommodated.
## An Unexplored World
At the beginning of each Blitz game, the world lies largely unexplored. The only exceptions are the settled Realms and
the array of Hyperstructures which can be seen in the World view, arranged in expanding rings around the center of the
map. The six hexes adjacent to these structures are also revealed, but beyond these instances, the world remains cloaked
by the mist, waiting for ambitious Lords to send forth their armies to explore. Once a hex is explored, the state of the
hex (i.e. the biome and whether it contains a world structure) is permanently revealed to all Lords.
## Map Layout
### Hyperstructure Positioning
The number of registered Lords for a game of Blitz determines the size of the map and the number of Hyperstructures
available for Lords to compete over. A single Hyperstructure marks the center of the map, around which other concentric
Hyperstructure 'rings' are spawned every 15 hexes until all players are accommodated.
There is no immunity period in Blitz. All Realms are able to be attacked and claimed from the moment the game begins.
 ---
file: docs/pages/development/axis/cli-reference.mdx
meta: {
"layout": "docs",
"title": "Axis CLI Reference"
}
# Axis CLI Reference
## Commands
| Command | Description |
| ------------------------------------- | ------------------------------------------------------------------------------------------------------ |
| `axis` / `axis run` | Run in TUI mode |
| `axis run --headless --world=
---
file: docs/pages/development/axis/cli-reference.mdx
meta: {
"layout": "docs",
"title": "Axis CLI Reference"
}
# Axis CLI Reference
## Commands
| Command | Description |
| ------------------------------------- | ------------------------------------------------------------------------------------------------------ |
| `axis` / `axis run` | Run in TUI mode |
| `axis run --headless --world= In Season 1, individual armies consist of a single troop type and tier—streamlining combat strategy and simplifying
interactions on the world map. Each hex can host only one army, so Lords must carefully manage their positioning and
engagement opportunities.
Each Realm and Village has a limited number of guard and field armies The number of armies can be increased by upgrading
the Realm / Village level as explained in the [Realms](/eternum/realm-and-villages/realm) section. Each military
building constructed on a Realm or Village also increases total field armies by 1 (up to a maximum of
**+{ETERNUM_CONFIG().troop.limit.explorerMaxPartyCount-4}**). Lords can deploy armies from the Military tab in the Local
view. The maximum size of an army is **30,000**
### Field Armies
Field armies are used to project force on the world map, explore unknown territories, patrol borders, defend key areas,
or march against your enemies. These armies are deployed onto one of the six hexes surrounding their parent Realm on the
world map. If all hexes adjacent to the Realm are occupied, a field army cannot be deployed. Once deployed, these armies
occupy a hex and traverse the world map based on the conditions outlined in the World Map & Movement section.
Lords may direct their field armies to attack another army or structure on any adjacent hex by selecting the army with
left-click, then right-clicking the target hex. When attacking a structure, the field army will engage in combat against
any guard armies present.
Flow to create field army in the client
Flow to create guard in the client
Attack field army with structure
In Season 1, individual armies consist of a single troop type and tier—streamlining combat strategy and simplifying
interactions on the world map. Each hex can host only one army, so Lords must carefully manage their positioning and
engagement opportunities.
Each Realm and Village has a limited number of guard and field armies The number of armies can be increased by upgrading
the Realm / Village level as explained in the [Realms](/eternum/realm-and-villages/realm) section. Each military
building constructed on a Realm or Village also increases total field armies by 1 (up to a maximum of
**+{ETERNUM_CONFIG().troop.limit.explorerMaxPartyCount-4}**). Lords can deploy armies from the Military tab in the Local
view. The maximum size of an army is **30,000**
### Field Armies
Field armies are used to project force on the world map, explore unknown territories, patrol borders, defend key areas,
or march against your enemies. These armies are deployed onto one of the six hexes surrounding their parent Realm on the
world map. If all hexes adjacent to the Realm are occupied, a field army cannot be deployed. Once deployed, these armies
occupy a hex and traverse the world map based on the conditions outlined in the World Map & Movement section.
Lords may direct their field armies to attack another army or structure on any adjacent hex by selecting the army with
left-click, then right-clicking the target hex. When attacking a structure, the field army will engage in combat against
any guard armies present.
Flow to create field army in the client
Flow to create guard in the client
Attack field army with structure
No materials are safe from pillagers, $LORDS tokens can be raided as well
### Settling
To settle a Realm, Lords must first burn a Season Pass, which gives them the ability to select the location of their
homeland from an array of locations scattered across the map. For Season 1, there is a seven-day settling period before
the game starts, allowing players to organize and position themselves before a move can be made. Realms can still be
settled after this period, however the earlier in the season that Lords can establish their holdings, the greater their
production potential and overall experience.
 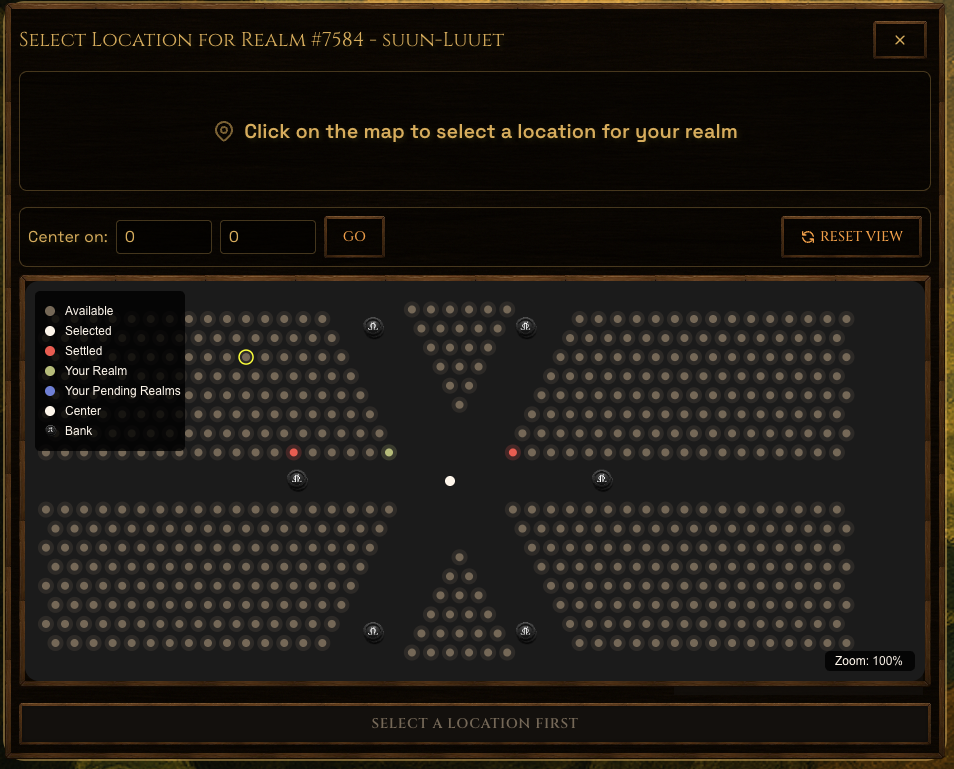

When the game starts, all structures are immune to attacks and raids for 24 hours. Once the first day of gameplay has concluded, there are no more instances of immunity, all Realms and Villages settling into the game after this time will need to rely on their starting defences and consider their starting locations carefully. Lords entering the game after the immunity period are advised to make use of the spectator mode to scout for relatively safe spawning locations before initiating a settling transaction.
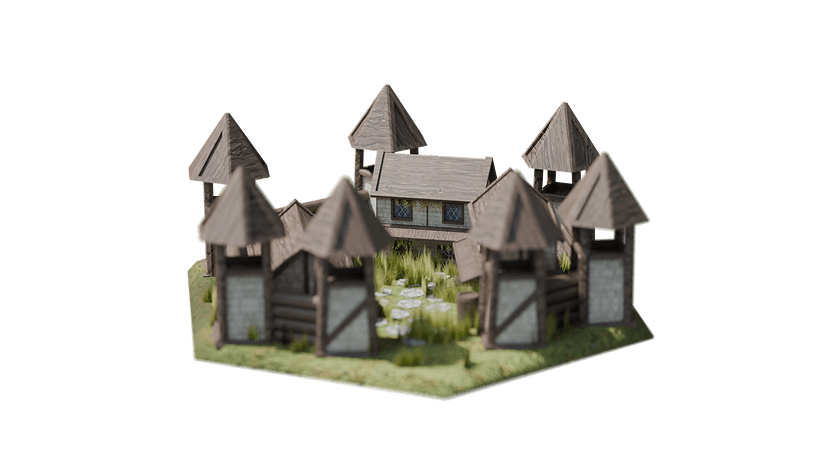 ### Settling
Villages are settled by minting a Village token. Aspiring settlers can choose to place their Village next to a specific
Realm by entering the asset ID of a settled Realm, or let fate guide them to a random Realm's outskirts - either way,
the Realm that they spawn adjacent to becomes that Village's 'parent' Realm. Players may also choose which of the six
possible hexes they spawn on by selecting a compass direction.
### Settling
Villages are settled by minting a Village token. Aspiring settlers can choose to place their Village next to a specific
Realm by entering the asset ID of a settled Realm, or let fate guide them to a random Realm's outskirts - either way,
the Realm that they spawn adjacent to becomes that Village's 'parent' Realm. Players may also choose which of the six
possible hexes they spawn on by selecting a compass direction.
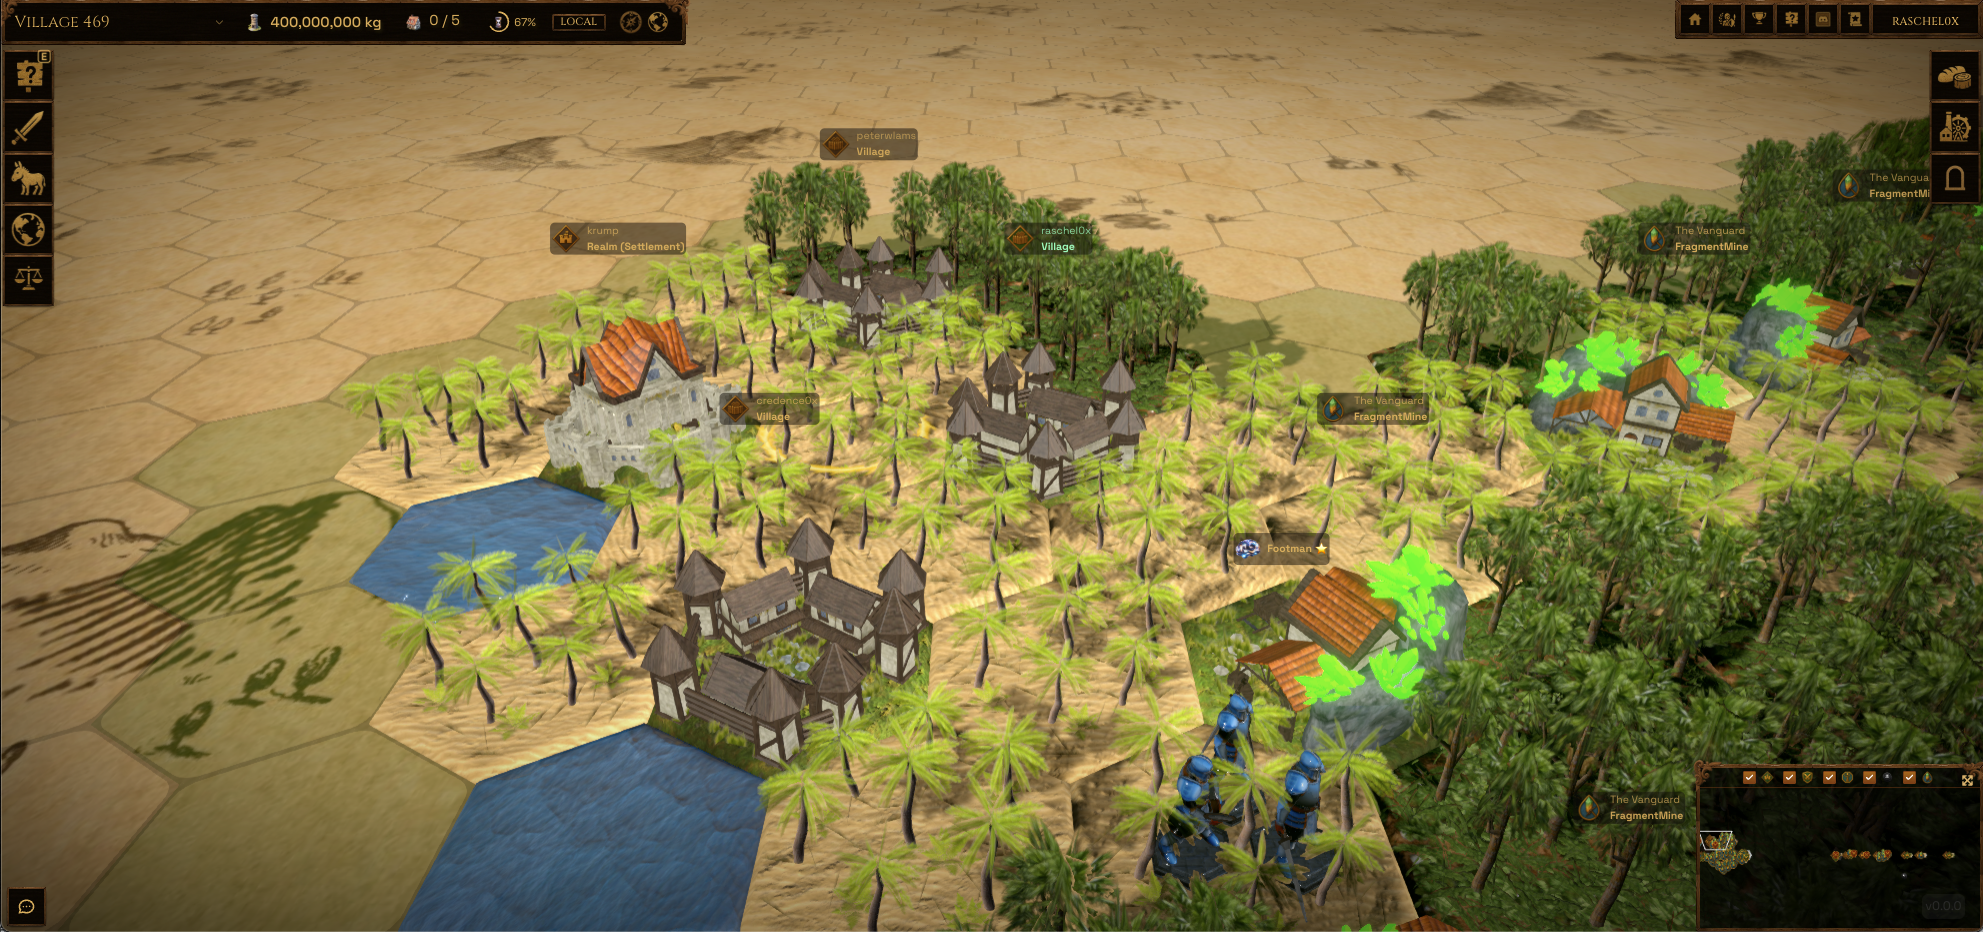 *Three villages settled next to a realm*
### Starting Resources
*Three villages settled next to a realm*
### Starting Resources

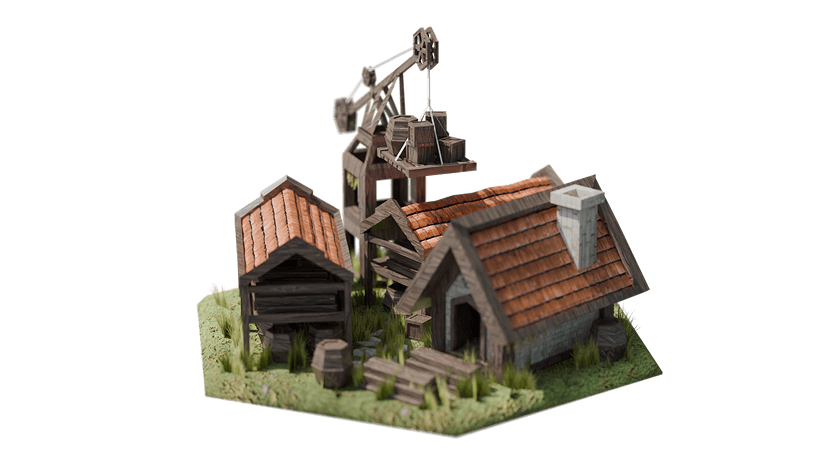 Expand your storage capacity to support your growing realm:
* **Capacity**: Each storehouse adds
{formatNumberWithCommas(ETERNUM_CONFIG().carryCapacityGram[CapacityConfig.Storehouse]/1000 )}kg of storage capacity.
* **Expansion**: Build additional storehouses to increase total storage.
* **Danger**: When storage is full new production is wasted
## World Structure Storage
All world structures have set storage capacities **(that cannot be expanded through the use of storehouses)**. These
capacities are as follows:
| Structure Type | Storage Capacity |
| -------------- | ------------------------------------------------------------------------------------------------------------ |
| Hyperstructure | {formatNumberWithCommas(ETERNUM_CONFIG().carryCapacityGram[CapacityConfig.HyperstructureStructure]/1000)} kg |
| Bank | {formatNumberWithCommas(ETERNUM_CONFIG().carryCapacityGram[CapacityConfig.BankStructure]/1000)} kg |
| Fragment Mine | {formatNumberWithCommas(ETERNUM_CONFIG().carryCapacityGram[CapacityConfig.FragmentMineStructure]/1000)} kg |
## Storage Management Tips
> 💡 **Best Practices**
>
> * Check storage levels regularly
> * Build new storehouses before reaching capacity
> * Pause production when storage is nearly full
> * Plan material usage to maximize storage efficiency
---
file: docs/pages/eternum/resources/transfers-and-trade.mdx
meta: {}
import { importantNote } from "@/components/styles";
# 📜 Transfers & Trade
## Transport
### Transfers
Throughout the season, Lords will face the need to transfer materials from place to place around the world map, whether
it be to their own Realms and Villages, or other structures like Banks, Hyperstructures, and Fragment Mines. Lords have
two primary options for initiating transfers:
* **Detailed Transfer**: Players can use the comprehensive transfer menu accessible from the Trade tab. This allows
transfers of multiple types of materials simultaneously, to any structure on the map—including those belonging to
other players.
* **Quick Transfer**: Alternatively, Lords can swiftly transfer resources between their own structures using the
resources sidebar, ideal for managing internal logistics and maintaining supply chains.
### The Donkey Network
When a transfer is initiated, donkeys travel through the invisible and immutable donkey network. This is the key
infrastructure upon which all material transport takes place, facilitating trade between players and Banks. One donkey
is capable of carrying up to 500 kg of materials, so the number of donkeys required for a transfer depends on the total
weight of the materials being moved. Once a transfer is initiated, it cannot be cancelled, and the journey will take
some time depending on the distance to the destination structure. Upon arrival, transferred materials and donkeys must
be manually claimed via the 'Resource Arrivals' tab before they become available for use.
Expand your storage capacity to support your growing realm:
* **Capacity**: Each storehouse adds
{formatNumberWithCommas(ETERNUM_CONFIG().carryCapacityGram[CapacityConfig.Storehouse]/1000 )}kg of storage capacity.
* **Expansion**: Build additional storehouses to increase total storage.
* **Danger**: When storage is full new production is wasted
## World Structure Storage
All world structures have set storage capacities **(that cannot be expanded through the use of storehouses)**. These
capacities are as follows:
| Structure Type | Storage Capacity |
| -------------- | ------------------------------------------------------------------------------------------------------------ |
| Hyperstructure | {formatNumberWithCommas(ETERNUM_CONFIG().carryCapacityGram[CapacityConfig.HyperstructureStructure]/1000)} kg |
| Bank | {formatNumberWithCommas(ETERNUM_CONFIG().carryCapacityGram[CapacityConfig.BankStructure]/1000)} kg |
| Fragment Mine | {formatNumberWithCommas(ETERNUM_CONFIG().carryCapacityGram[CapacityConfig.FragmentMineStructure]/1000)} kg |
## Storage Management Tips
> 💡 **Best Practices**
>
> * Check storage levels regularly
> * Build new storehouses before reaching capacity
> * Pause production when storage is nearly full
> * Plan material usage to maximize storage efficiency
---
file: docs/pages/eternum/resources/transfers-and-trade.mdx
meta: {}
import { importantNote } from "@/components/styles";
# 📜 Transfers & Trade
## Transport
### Transfers
Throughout the season, Lords will face the need to transfer materials from place to place around the world map, whether
it be to their own Realms and Villages, or other structures like Banks, Hyperstructures, and Fragment Mines. Lords have
two primary options for initiating transfers:
* **Detailed Transfer**: Players can use the comprehensive transfer menu accessible from the Trade tab. This allows
transfers of multiple types of materials simultaneously, to any structure on the map—including those belonging to
other players.

* **Quick Transfer**: Alternatively, Lords can swiftly transfer resources between their own structures using the
resources sidebar, ideal for managing internal logistics and maintaining supply chains.

### The Donkey Network
When a transfer is initiated, donkeys travel through the invisible and immutable donkey network. This is the key
infrastructure upon which all material transport takes place, facilitating trade between players and Banks. One donkey
is capable of carrying up to 500 kg of materials, so the number of donkeys required for a transfer depends on the total
weight of the materials being moved. Once a transfer is initiated, it cannot be cancelled, and the journey will take
some time depending on the distance to the destination structure. Upon arrival, transferred materials and donkeys must
be manually claimed via the 'Resource Arrivals' tab before they become available for use.
In Season 1, resource arrivals are restricted by 'gates' to assist in reducing the load that resource arrival entities have on the game. As donkeys arrive at their destination bearing their various goods, they need to wait until the start of a new Eternum Day for the structure's arrival gate to open before they can enter and be claimed by the owning Lord. For example, if a transfer arrives at 2:56 p.m. the owner of the structure will only need to wait until 3:00 p.m. for the transfer to become claimable, however if the transfer arrives at 3:02 p.m., the goods won't be claimable until the next Eternum Day starts (4 p.m.).
 ## Stamina
Troops in Eternum are deployed onto the world map as armies. Army movement and actions across the map are governed by
stamina, a critical resource Lords must carefully manage.
Stamina is expended whenever an army moves between hexes, explores previously unrevealed areas, or launches an attack
against enemy forces. Each of these actions has a specific stamina cost, making strategic planning essential to
maximizing an army's effectiveness. Armies regenerate stamina at a consistent rate of +2 stamina per Phase (10 minutes),
totaling +12 stamina per Eternum Day. Each troop type possesses different maximum stamina capacities, outlined in the
table below:
Moving armies in the client
Explore in the client
Transfer troops in the client
## Stamina
Troops in Eternum are deployed onto the world map as armies. Army movement and actions across the map are governed by
stamina, a critical resource Lords must carefully manage.
Stamina is expended whenever an army moves between hexes, explores previously unrevealed areas, or launches an attack
against enemy forces. Each of these actions has a specific stamina cost, making strategic planning essential to
maximizing an army's effectiveness. Armies regenerate stamina at a consistent rate of +2 stamina per Phase (10 minutes),
totaling +12 stamina per Eternum Day. Each troop type possesses different maximum stamina capacities, outlined in the
table below:
Moving armies in the client
Explore in the client
Transfer troops in the client
 ## An Unexplored World
At the beginning of each season, Eternum lies entirely unexplored, shrouded in mystery and opportunity. The only
exceptions are the six ancient Banks, whose location and surrounding hexes are known and visible from the outset. They
can be seen when settling and when observing the world view, each equidistant from the center of the map and from one
another.
When Lords settle a Realm, the six hexes directly adjacent to the Realm hex and the six possible village locations are
automatically revealed if they haven't already been explored. Beyond these instances, the world remains cloaked by the
mist, waiting for ambitious Lords to send forth their armies to explore. Once a hex is explored, the state of the hex
(i.e. the biome and whether it contains a world structure or army) is permanently revealed to all Lords.
## Biomes
Each hex is assigned one of 16 biome types, each with unique aesthetics and strategic implications. These biomes are
procedurally generated across the world map following specific rules that dictate their distribution, ensuring a
coherent yet varied world, with certain biomes naturally occurring more or less frequently than others.
Biomes impact both combat effectiveness and troop movement. Each troop type—Knights, Crossbowmen, and Paladins—can
potentially be advantaged or disadvantaged in battle depending on the biome in which combat takes place; this is
explained in more detail in the [Military section](/eternum/military/stamina-and-biomes). Additionally, biomes have the
potential to enhance or impede army maneuvers, as the various biomes impact the stamina consumption of each troop type
differently as they move between hexes—this is explained further in the
[Movement & Exploration](/eternum/worldmap-movement/movement) section below.
---
file: docs/pages/overview/chests/contents.mdx
meta: {
"title": "Chest Contents",
"description": "Details on the contents of Loot Chests"
}
import EternumRewardsChestTable from "@/components/eternum-components/EternumRewardsChestTable";
import BlitzRewardsChestTable from "@/components/blitz-components/BlitzRewardsChestTable";
# 📜 Chest Contents
Each Loot Chest contains a varying number of items. For each item slot in a chest, an independent roll is performed
against the item list for that Loot Chest type. Every item on the list has a defined draw chance. Because each roll is
independent, Lords may receive multiple copies of the same item in a single Loot Chest.
Loot Chest item lists are defined by both the Loot Chest type and the epoch from which they originated. As new epochs
begin, new chests of the same type will contain different items. For example, items that can be drawn from an Eternum
Rewards Chest from Epoch 2 will differ from those available in the Epoch 1 version of that chest.
*Note: Relics can currently be found in [Relic Crates](/blitz/worldmap-movement/worldmap#relic-crates) in Blitz.*
## Loot Chest Item Lists
The following item lists contain information on the cosmetic items that can potentially be drawn from the various types
of Loot Chest in the Realms ecosystem. Each cosmetic item is defined by:
* **Item Name**
* **Epoch Item Number** - the ID of unique items within an Epoch, the numbering starts again from 1 for each new epoch
(consider each epoch of items as a separate collection).
* **Description** - a basic description, including the item set it is part of (if any).
* **Rarity** - the relative rarity of the item, according to the collection design.
* **Type** - the type of item (i.e. the 'slot' that the cosmetic occupies when outfitting a Realm).
* **Troop Type** - whether the cosmetic item is relevant to a particular type of troop (Knight, Crossbowman, or
Paladin).
* **Draw Chance** - the percentage chance of rolling this item on any of the three possible draws per Loot Chest.
### Eternum Rewards Chest
The Eternum Rewards Chest can contain three items from the following list:
## An Unexplored World
At the beginning of each season, Eternum lies entirely unexplored, shrouded in mystery and opportunity. The only
exceptions are the six ancient Banks, whose location and surrounding hexes are known and visible from the outset. They
can be seen when settling and when observing the world view, each equidistant from the center of the map and from one
another.
When Lords settle a Realm, the six hexes directly adjacent to the Realm hex and the six possible village locations are
automatically revealed if they haven't already been explored. Beyond these instances, the world remains cloaked by the
mist, waiting for ambitious Lords to send forth their armies to explore. Once a hex is explored, the state of the hex
(i.e. the biome and whether it contains a world structure or army) is permanently revealed to all Lords.
## Biomes
Each hex is assigned one of 16 biome types, each with unique aesthetics and strategic implications. These biomes are
procedurally generated across the world map following specific rules that dictate their distribution, ensuring a
coherent yet varied world, with certain biomes naturally occurring more or less frequently than others.
Biomes impact both combat effectiveness and troop movement. Each troop type—Knights, Crossbowmen, and Paladins—can
potentially be advantaged or disadvantaged in battle depending on the biome in which combat takes place; this is
explained in more detail in the [Military section](/eternum/military/stamina-and-biomes). Additionally, biomes have the
potential to enhance or impede army maneuvers, as the various biomes impact the stamina consumption of each troop type
differently as they move between hexes—this is explained further in the
[Movement & Exploration](/eternum/worldmap-movement/movement) section below.
---
file: docs/pages/overview/chests/contents.mdx
meta: {
"title": "Chest Contents",
"description": "Details on the contents of Loot Chests"
}
import EternumRewardsChestTable from "@/components/eternum-components/EternumRewardsChestTable";
import BlitzRewardsChestTable from "@/components/blitz-components/BlitzRewardsChestTable";
# 📜 Chest Contents
Each Loot Chest contains a varying number of items. For each item slot in a chest, an independent roll is performed
against the item list for that Loot Chest type. Every item on the list has a defined draw chance. Because each roll is
independent, Lords may receive multiple copies of the same item in a single Loot Chest.
Loot Chest item lists are defined by both the Loot Chest type and the epoch from which they originated. As new epochs
begin, new chests of the same type will contain different items. For example, items that can be drawn from an Eternum
Rewards Chest from Epoch 2 will differ from those available in the Epoch 1 version of that chest.
*Note: Relics can currently be found in [Relic Crates](/blitz/worldmap-movement/worldmap#relic-crates) in Blitz.*
## Loot Chest Item Lists
The following item lists contain information on the cosmetic items that can potentially be drawn from the various types
of Loot Chest in the Realms ecosystem. Each cosmetic item is defined by:
* **Item Name**
* **Epoch Item Number** - the ID of unique items within an Epoch, the numbering starts again from 1 for each new epoch
(consider each epoch of items as a separate collection).
* **Description** - a basic description, including the item set it is part of (if any).
* **Rarity** - the relative rarity of the item, according to the collection design.
* **Type** - the type of item (i.e. the 'slot' that the cosmetic occupies when outfitting a Realm).
* **Troop Type** - whether the cosmetic item is relevant to a particular type of troop (Knight, Crossbowman, or
Paladin).
* **Draw Chance** - the percentage chance of rolling this item on any of the three possible draws per Loot Chest.
### Eternum Rewards Chest
The Eternum Rewards Chest can contain three items from the following list:
In-game application of cosmetic NFTs is still in development. Keep an eye out for announcements on when this feature will be available.
Loot Chests are a feature in development. Keep an eye out for announcements in the Realms Discord relating to Loot Chest rewards. This section will be updated as more information is made available to the community.